Welcome to part 2 of the Azure VPN blog, here you can find part 1. This part of the blog explains how to configure Azure VPN with Always ON and Azure Active Directory authentication and MFA. This will allow Modern Managed Azure AD Joined Windows 10 workplace to connect secure to the Azure network, and if required and you have a route back to on-premises you will be able to connect to on-premises network as well.
Part 2: Azure VPN – Point to Site
- Prepare
- Deploy Azure VPN app to Intune (MEM)
- Azure AD – Give consent
- Configure Azure AD – Azure VPN App.
- Configure Point to Site VPN
- Configure the Client.
- Deploy the Azure VPN client
- Allow Point to Site VPN to work to the on-premises network.
- Proof of the Pudding
- Configure Azure Multi Factor Authentication
Prepare
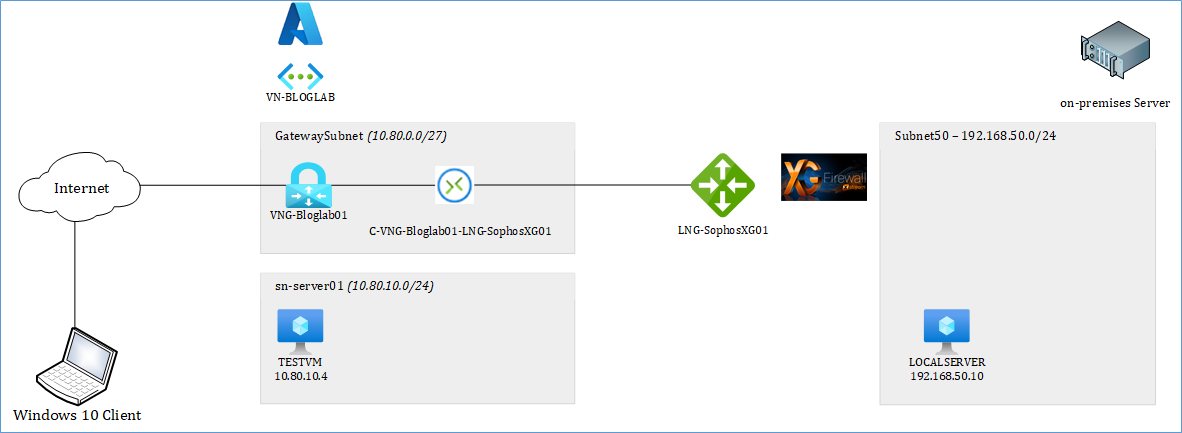
In my LAB I use a Hybrid Azure environment. I have a Windows Server running as Domain Controller, and use AAD Connect to sync users and groups to Azure AD. This server is also located in Azure.
Username: s.peters@bloglab.nl
Domain Local Group: SG_AzureVPNUsers
Both objects are synced to Azure AD.
Deploy Azure VPN app to Intune (MEM)
We start with adding the Azure VPN application in the Microsoft Endpoint Management portal (Intune). Login to the MEM portal with a Global Admin account: https://endpoint.microsoft.com/
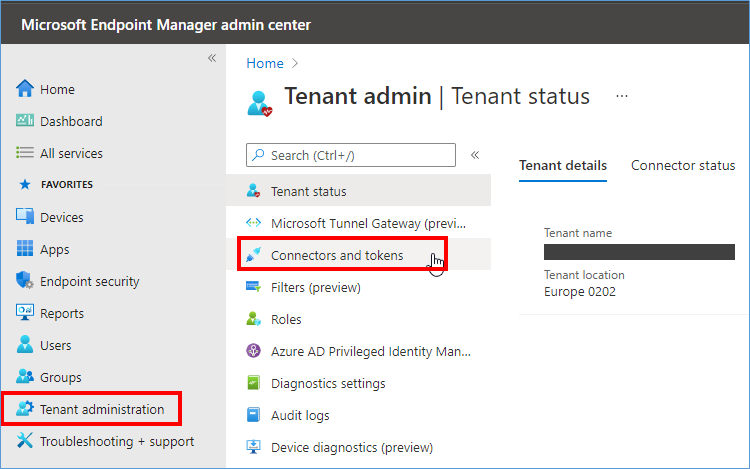
Click Tenant administration, and Connectors and tokens.
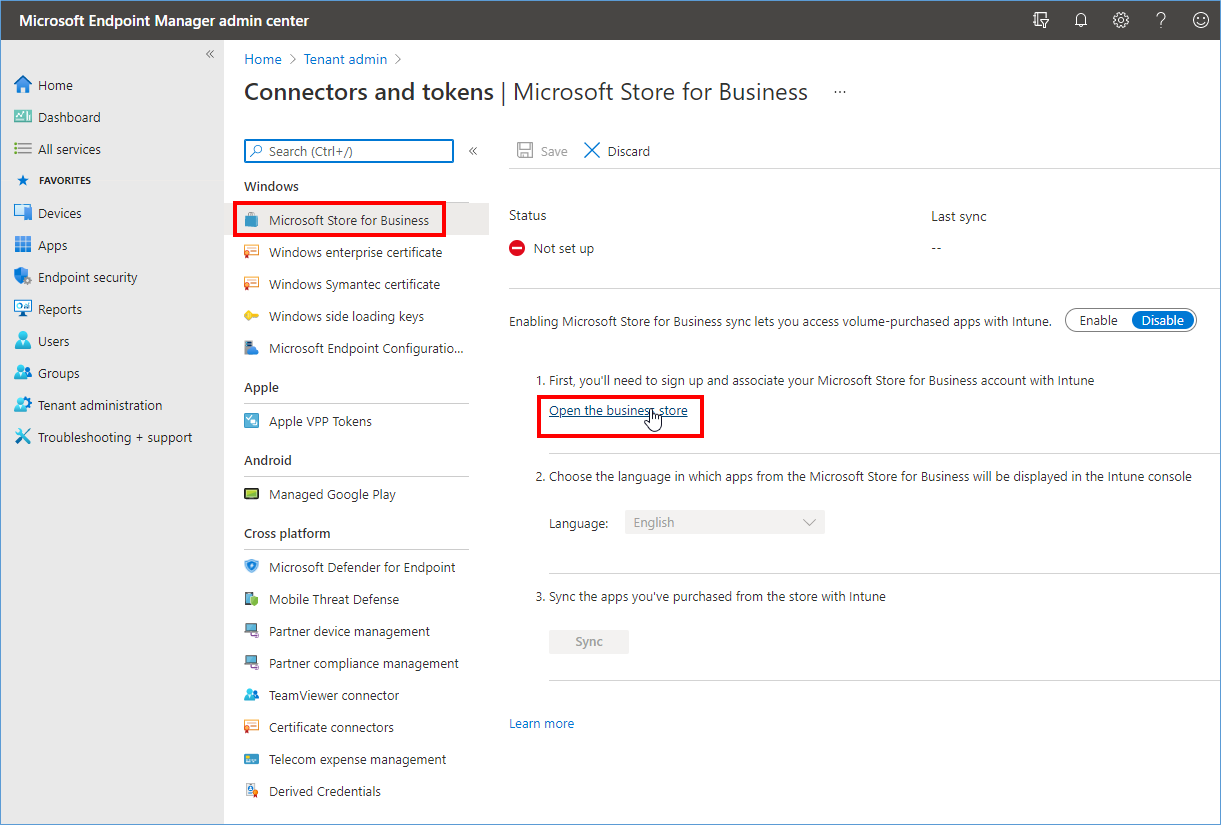
Click Microsoft Store for Business and click Open the business store.
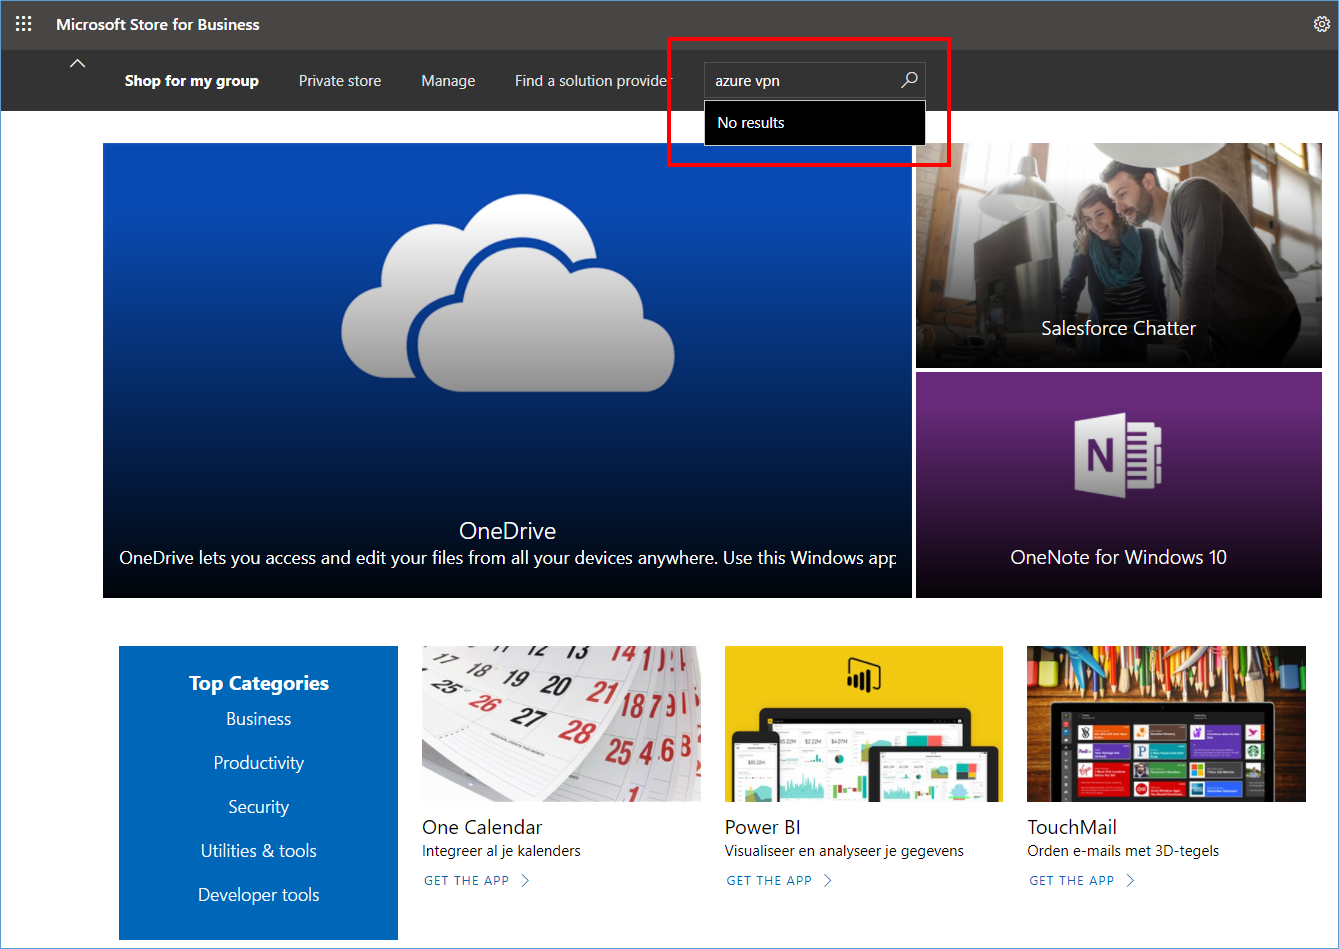
In the Business store enter “Azure VPN” in the search field and press the magnifying glass next to it.
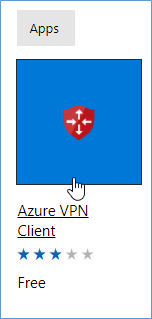
In the search results click the Azure VPN Client (Free)

Click the Get the App button. (If you get any agreement, read it and if you agree click, I accept).

The “purchase” was succeeded. You can now use the App. Please go back to the MEM portal, close the Business Store TAB in your browser.
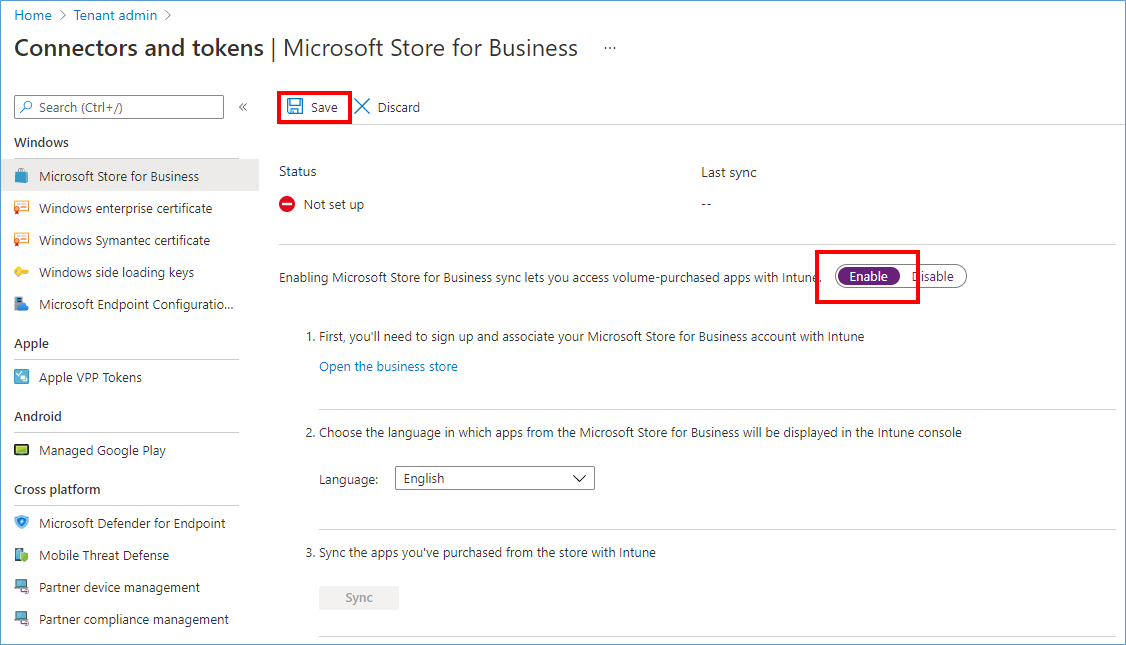
Back on this page, please enable the Sync and click Save.

After clicking save, click the Sync button at “3.”

The sync can take some time, until then the Azure VPN App is not available.
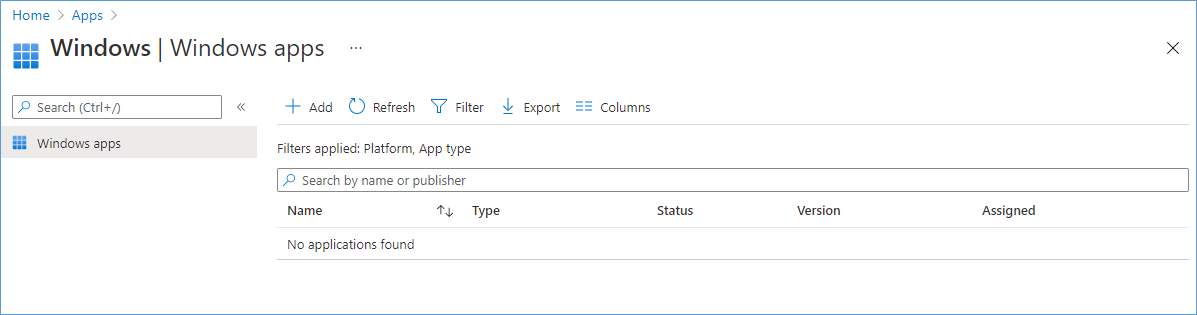
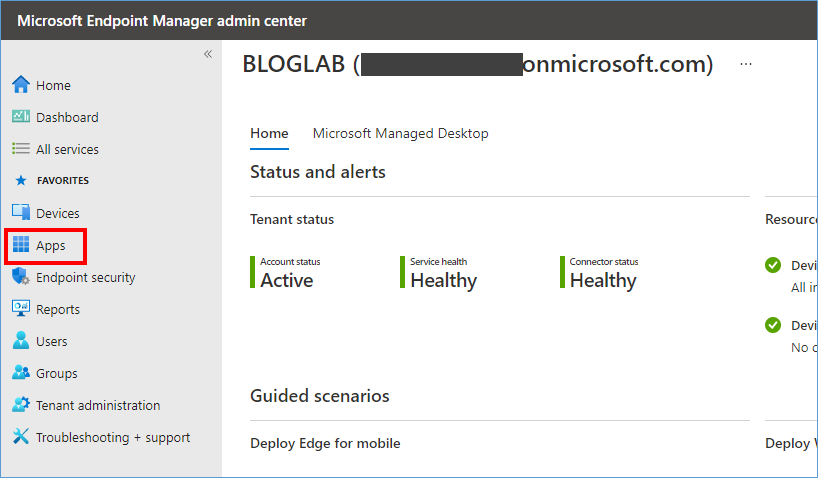
When you have absolutely nothing configured (new tenant) you will have a clean Apps overview like in the screenshot.
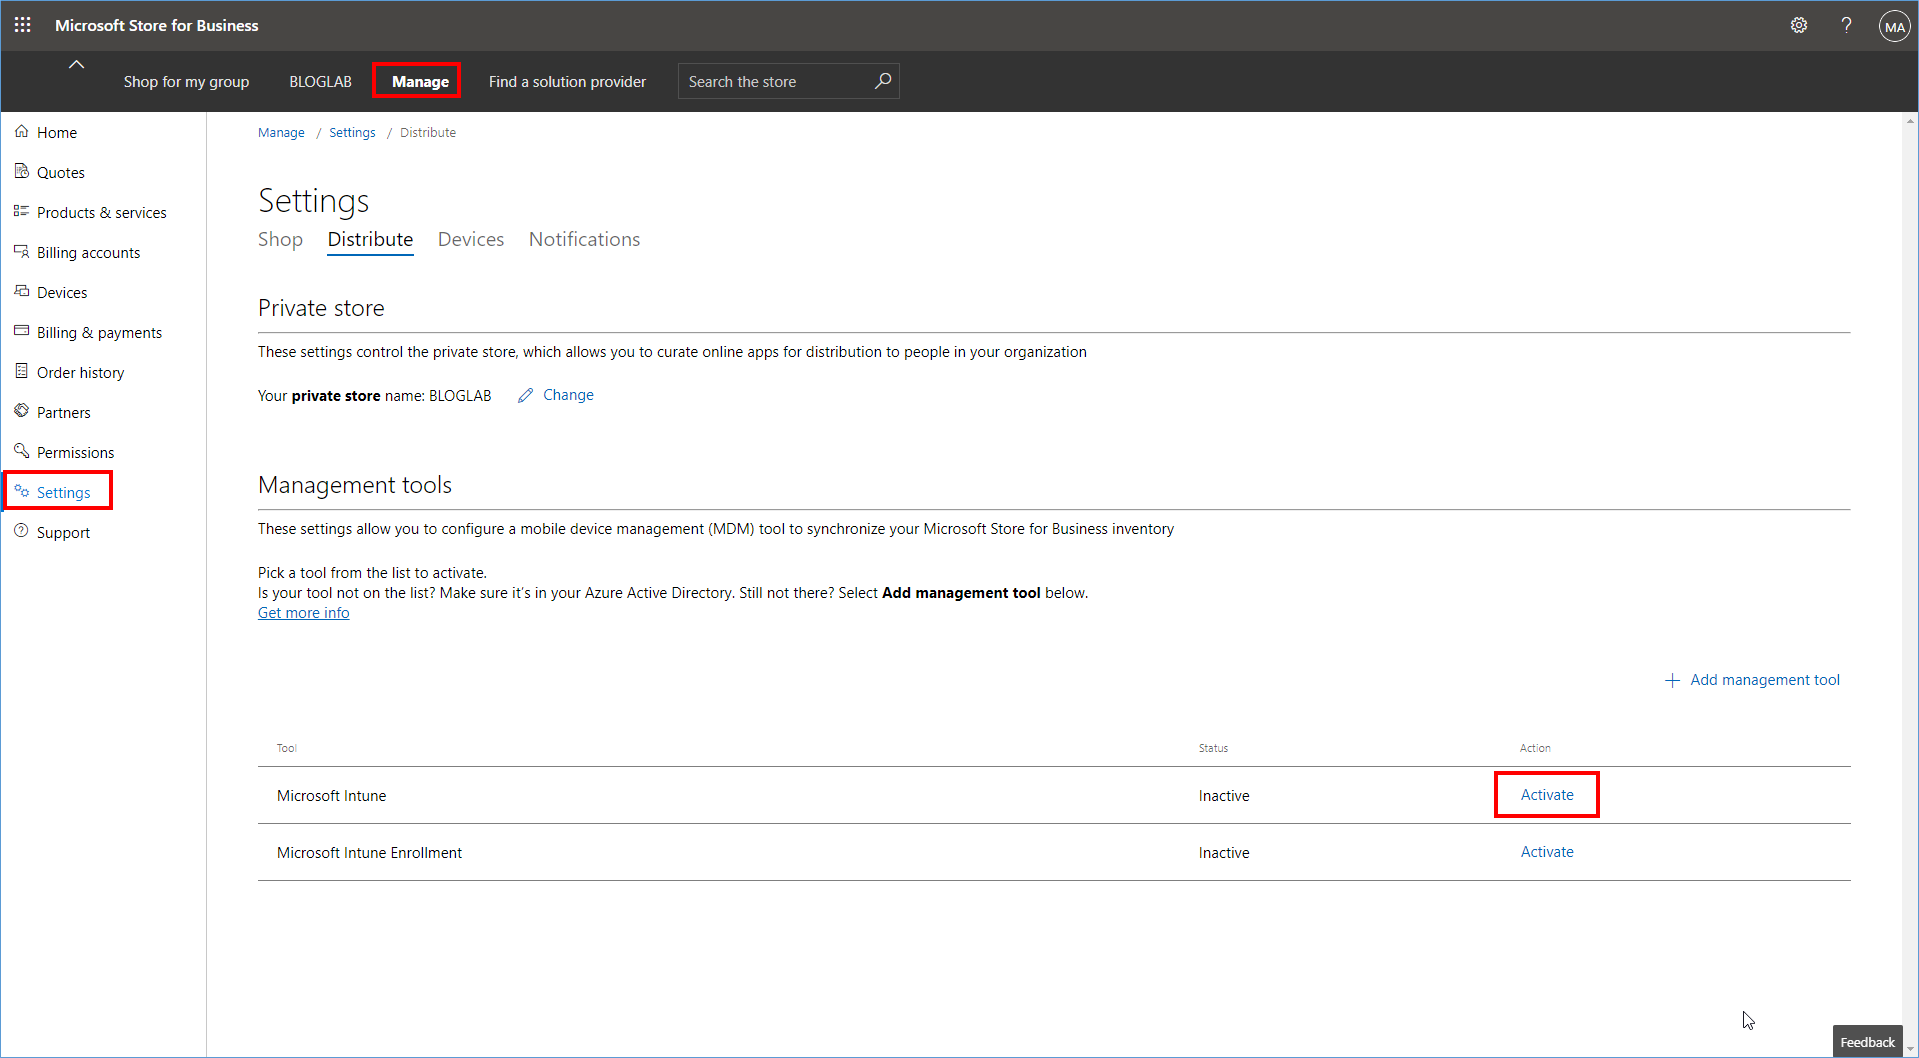
If the sync takes unusual long go back to the Business Store (https://businessstore.microsoft.com) and check this setting. Manage/Settings/Distribute. The Microsoft Intune “tool” must be activated.
Azure AD – Give consent
To be able to use Azure Always on VPN based on OpenVPN we need to consent this app to the Azure tenant. Source: https://docs.microsoft.com/en-us/azure/vpn-gateway/openvpn-azure-ad-tenant
On the docs page you can find the URL for consenting this App in Azure AD. I use the PUBLIC url because I use a PUBLIC tenant.
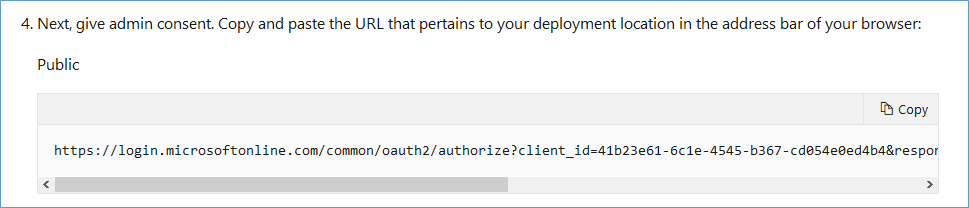
Login to the Azure portal with a Global Admin account and paste the above URL in your browser.
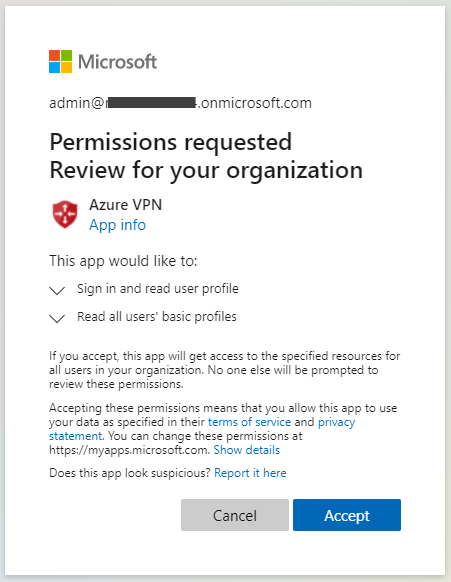
Click Accept to use the Azure VPN app in the tenant.
Configure Azure AD – Azure VPN App
Next, we configure the Point to Site on the Virtual Network Gateway. First, we collect the Azure AD Tenant ID from the portal.
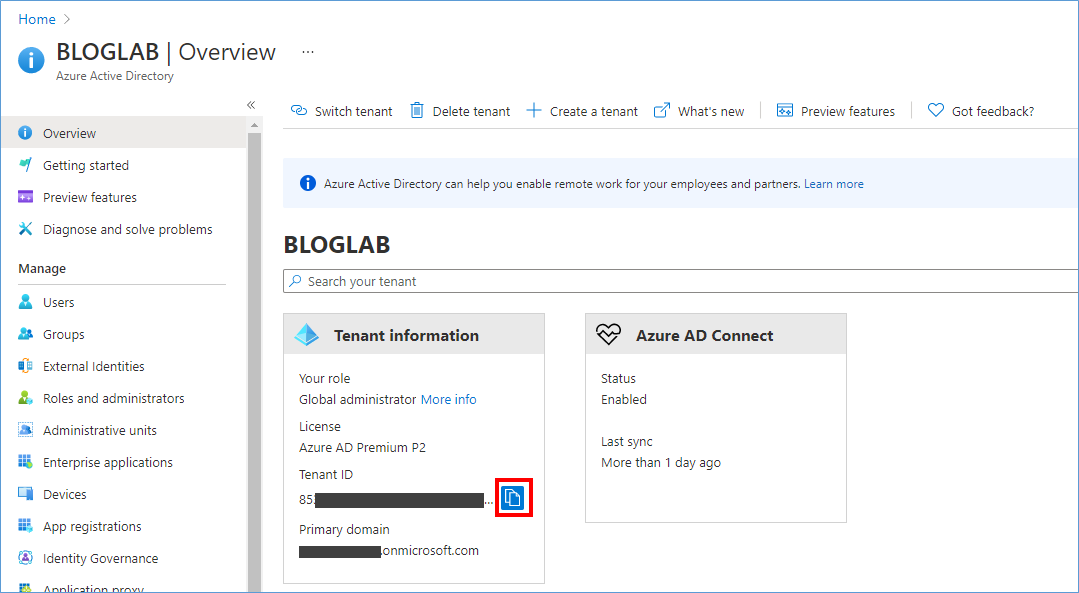
Go to your Azure Active Directory page in https://aad.portal.azure.com/ click on the copy to clipboard button next to the Tenant ID. Paste it in Notepad, we need it later.

In Azure AD click Enterprise applications.

In the list find and select Azure VPN.
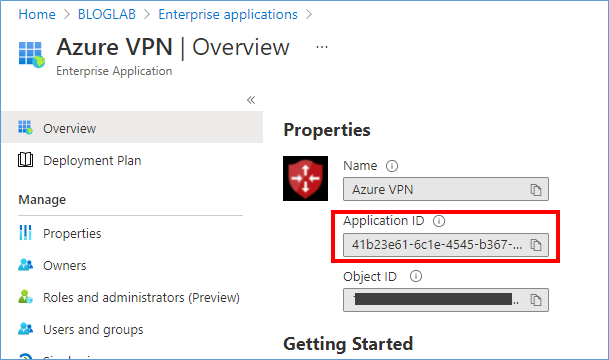
On the Overview page of the Azure VPN copy the App ID and paste this also in the Notepad.

Click on Properties and change the User assignment required to YES and press SAVE.
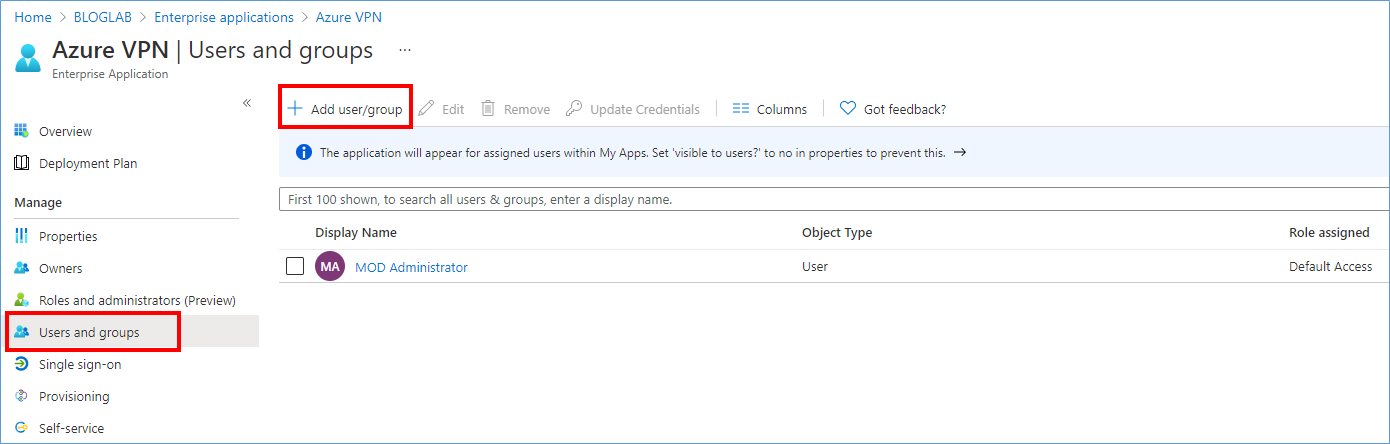
Click on Users and groups and click Add user/group.
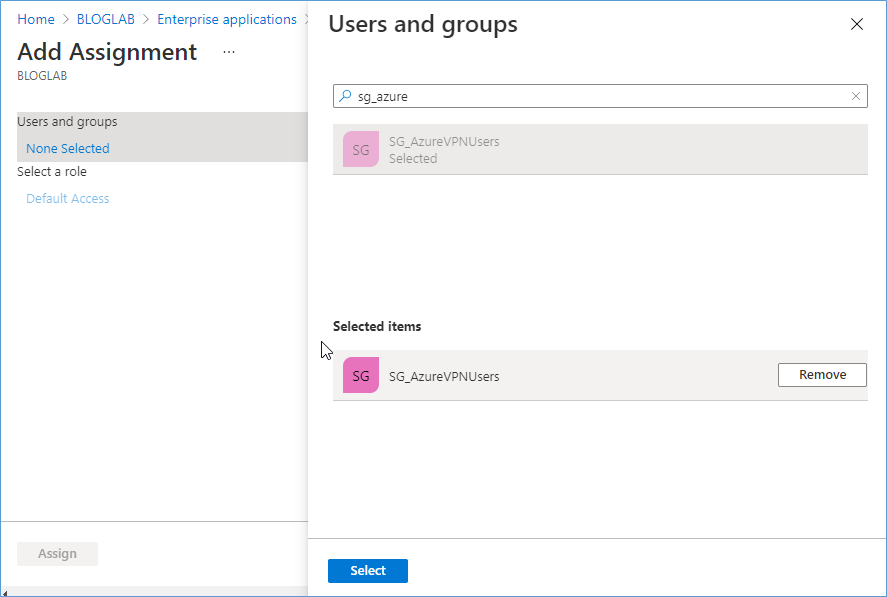
Add the users and/or groups you want to allow access to Azure VPN.
Configure Point to Site VPN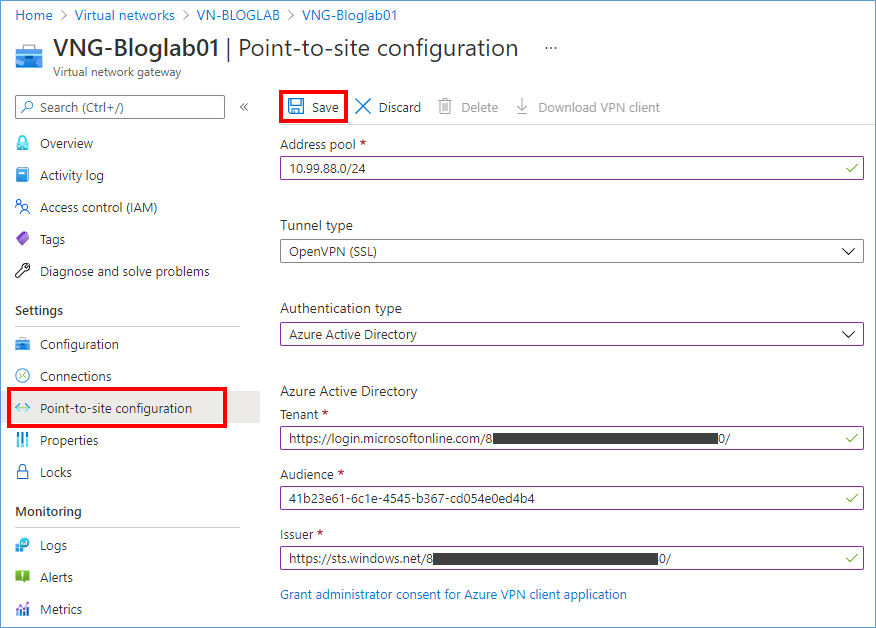
Browse to your Virtual Network Gateway, click Point-to-site configuration, and enter the data as in the picture and click Save.
| Name | Value | Description |
| Address pool | 10.99.88.0/24 | Enter a non-overlapping subnet, not part of VNET addresses. |
| Tunnel type | OpenVPN (SSL) | |
| Authentication Type | Azure Active Directory | |
| Tenant | https://login.microsoftonline.com/<tenant id>/ | Replace <tentant id> with the AAD ID from Notepad. Always end with a ‘/’. |
| Audience | 41b23e61-6c1e-4545-b367-cd054e0ed4b4 | App ID of the Azure ID (from Notepad) |
| Issuer | https://sts.windows.net/<tenant id>/ | Replace <tentant id> with the AAD ID from Notepad. Always end with a ‘/’. |
This is the easy part. Next, we need to configure the client.
Configure the Client.
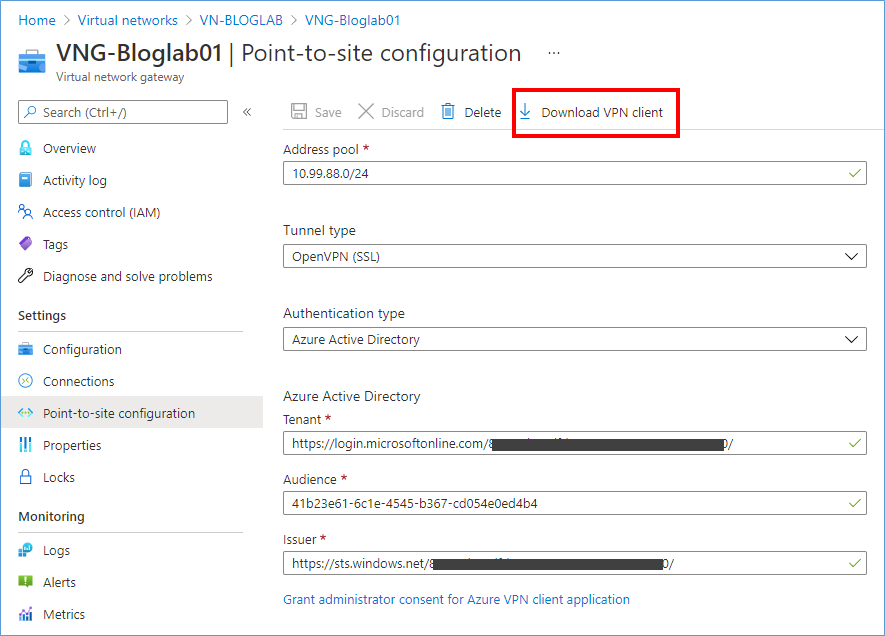
Go back to the Point-to-site configuration and click Download VPN Client. This will download a ZIP file with some config files. Extract the files to a temp folder. In the AzureVPN folder is a file called azurevpnconfig.xml open this file in Notepad and find the line with the name tag:
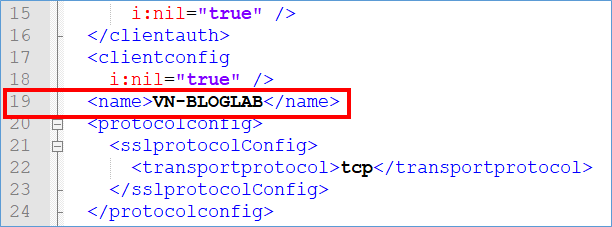
Copy the name (without the TAGs) to an empty Notepad for later use. In this example the name is: VN-BLOGLAB
Next find the fqdn TAG, we need this in a moment.

Go to this website: https://docs.microsoft.com/en-us/azure/vpn-gateway/vpn-profile-intune and find this section:
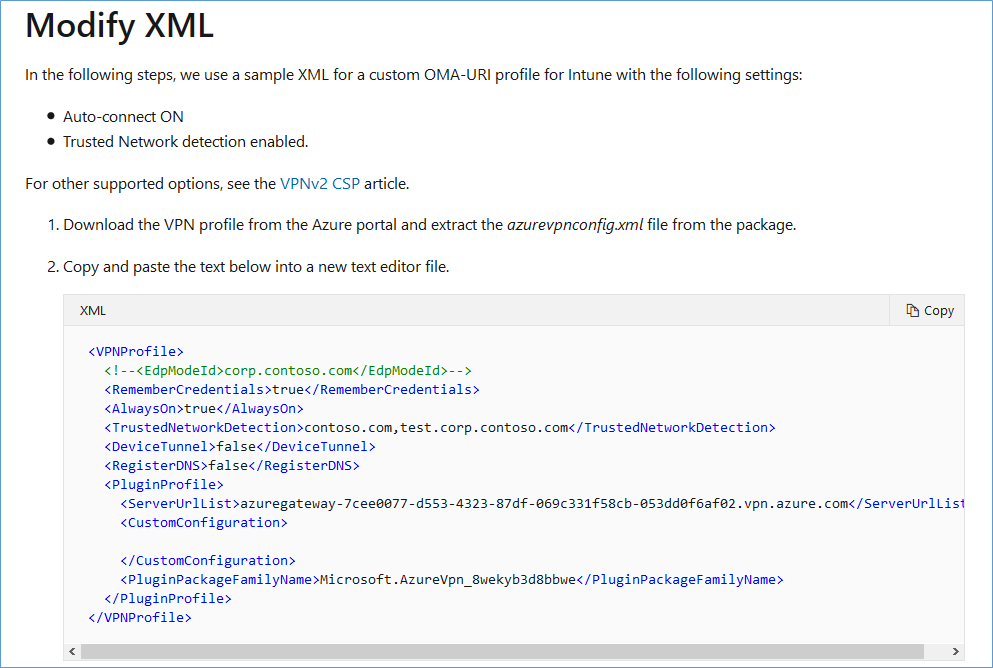
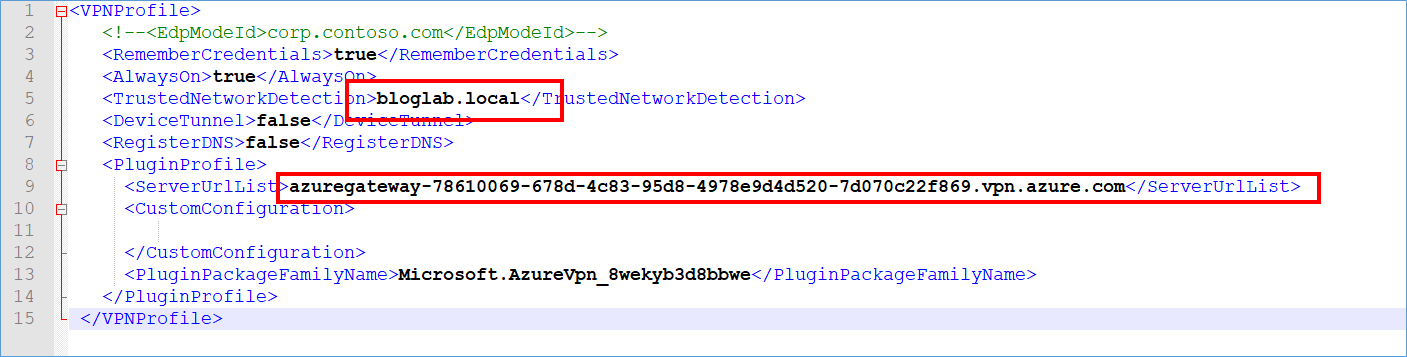
Copy the XML “Contoso” example to an empty Notepad file. Copy the fqdn from the azurevpnconfig.xml you downloaded and replace the example ServerUrlList with the one from the azurevpnconfig.xml.
Next copy the content of the entire azurevpnconfig.xml you downloaded to the clipboard and paste it in the Contoso Example XML between the <CustomConfiguration> and </CustomConfiguration> tags:
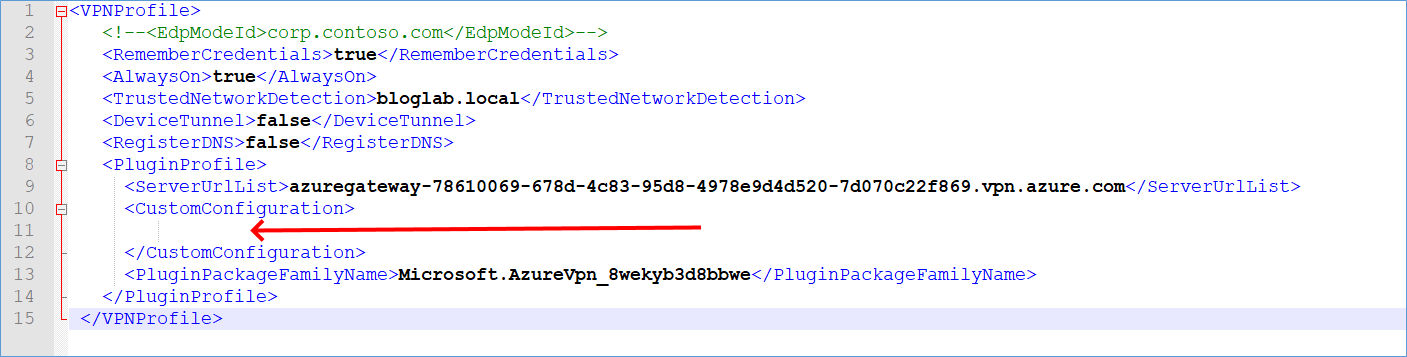
Very important: After the paste, remove all empty lines!
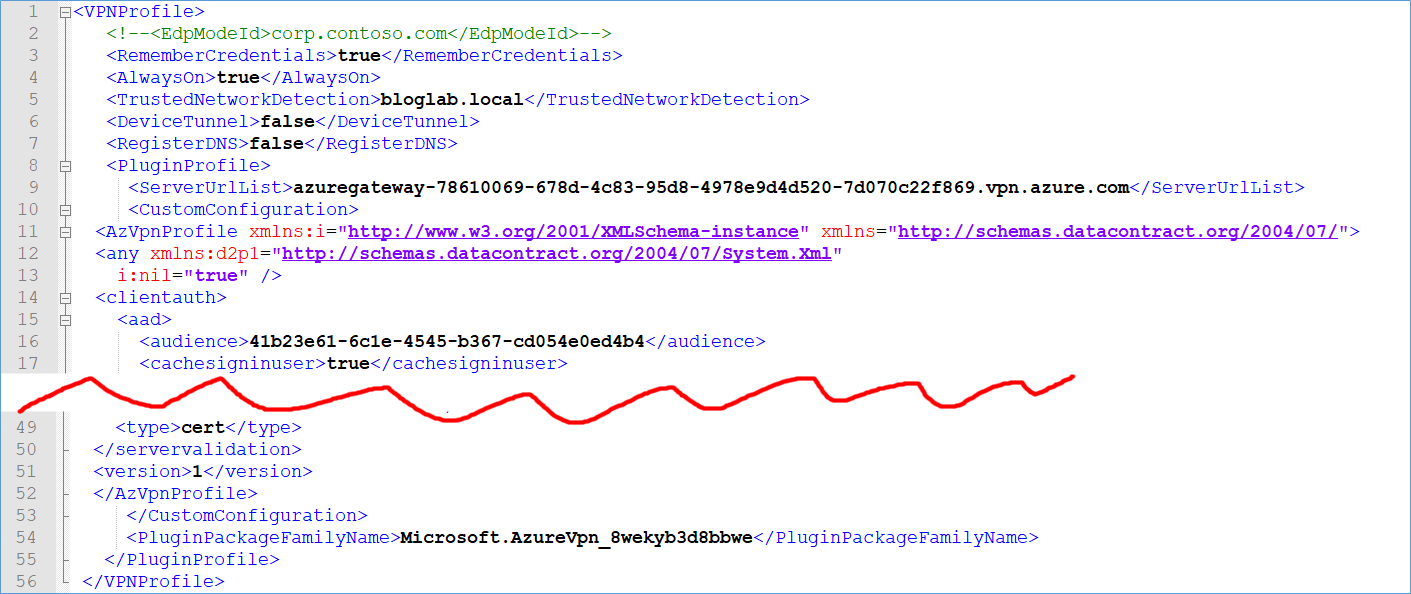
Save this XML file as “AzureVPN_Intune.xml” or any other name you choose.
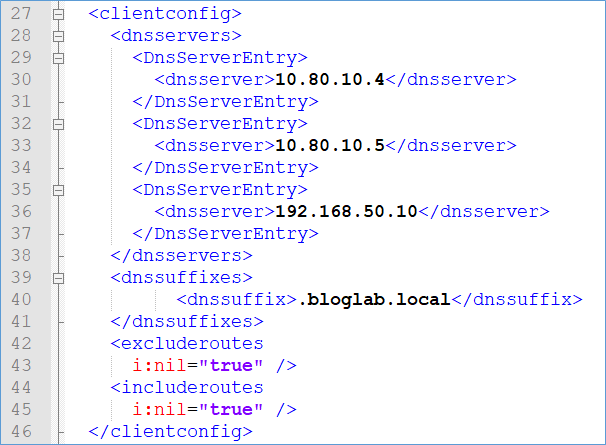
You might want to add DNS configuration to the XML file. Carefully add the line and remember, no empty lines in the final XML file.

Next, in the file there is a tag called “AlwaysON”, you can update the tag if you like. By default, it is “true”. Depending on your application change it before deploying to your clients.
Deploy the Azure VPN client
Go back to the Microsoft Endpoint Manager portal and click Apps.
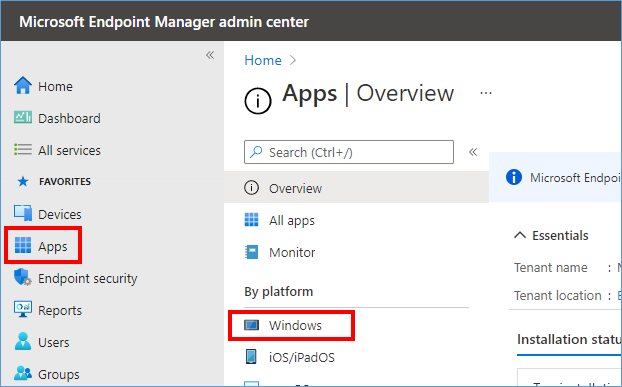
Click Windows.

Select the Azure VPN Client app.
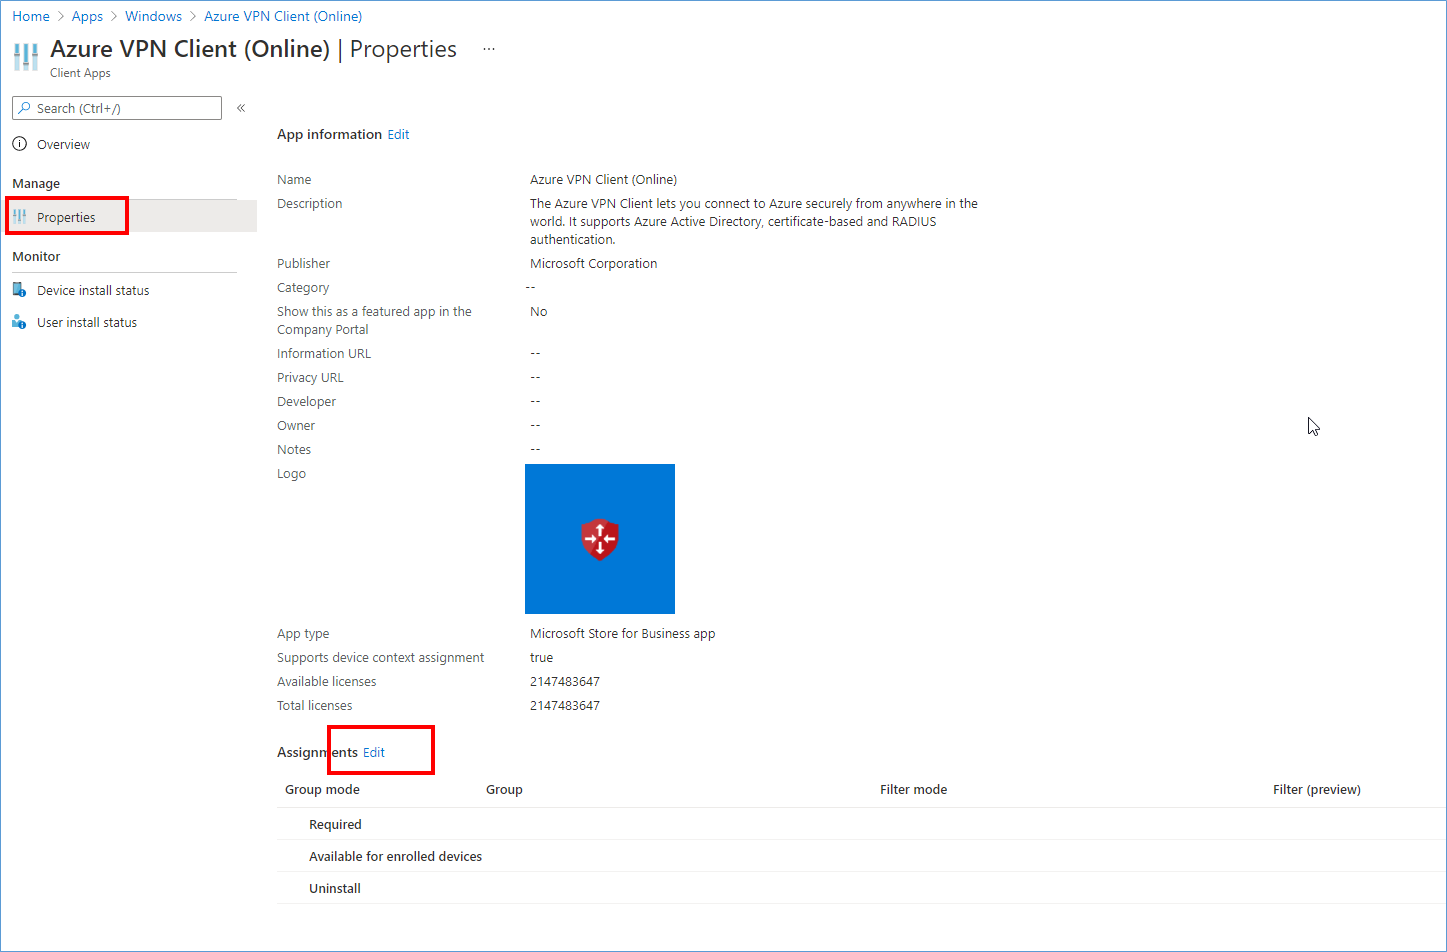
Click Properties and click Edit at the Assignments section.
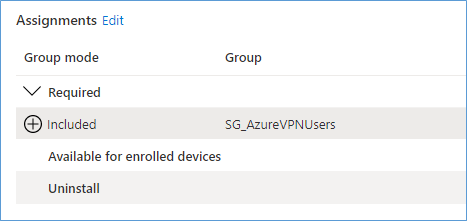
Add the SG_AzureVPNUsers group as Required to deploy the application to the clients. (You can also use Assigned and allow the user to install themselves.)
Next, we deploy the configuration (XML file) to the client.
Go back to the MEM portal and click Devices.
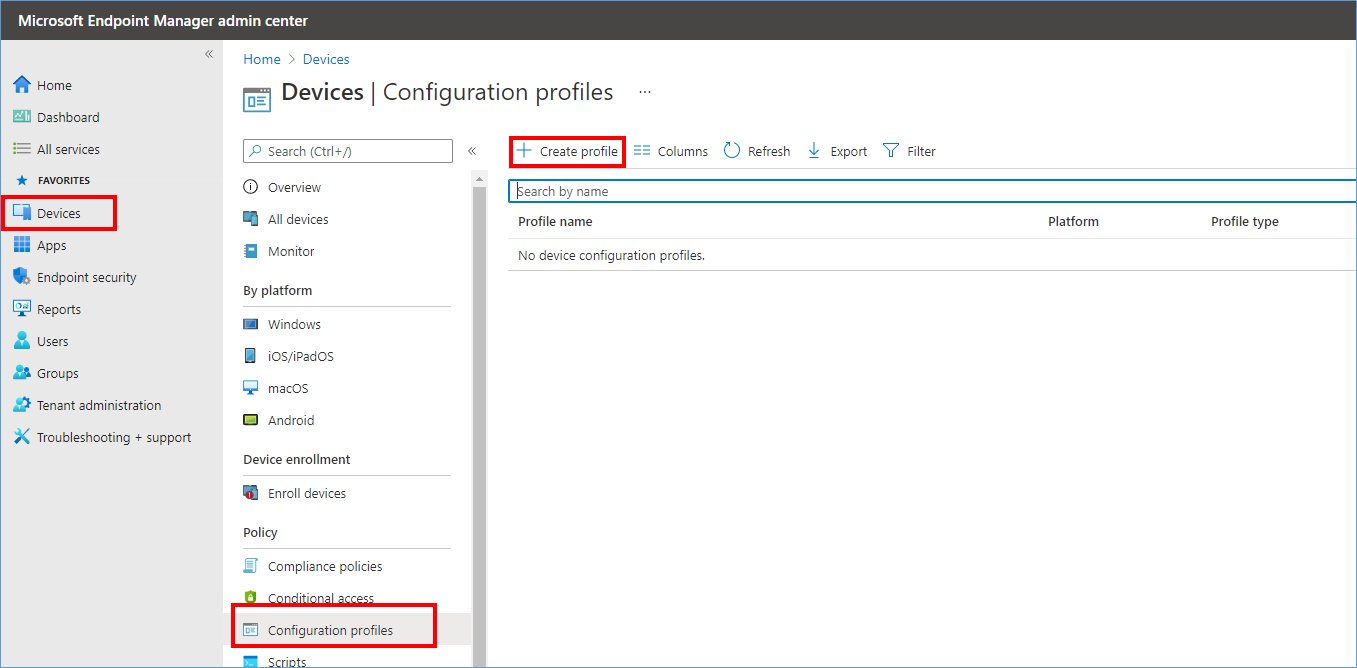
In Devices click Configuration profiles and Create Profile.
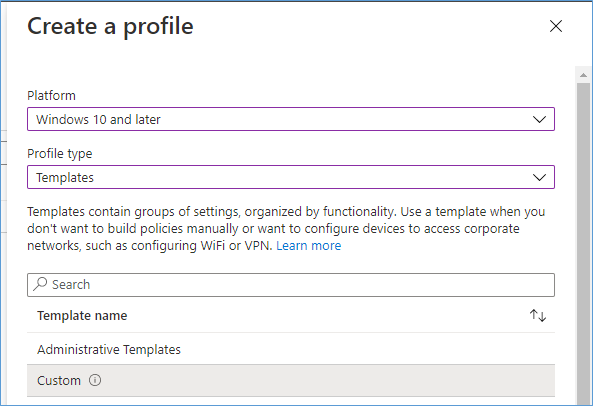
Choose, Windows 10 and later, profile type: Templates, template name: Custom. Click Create (below).
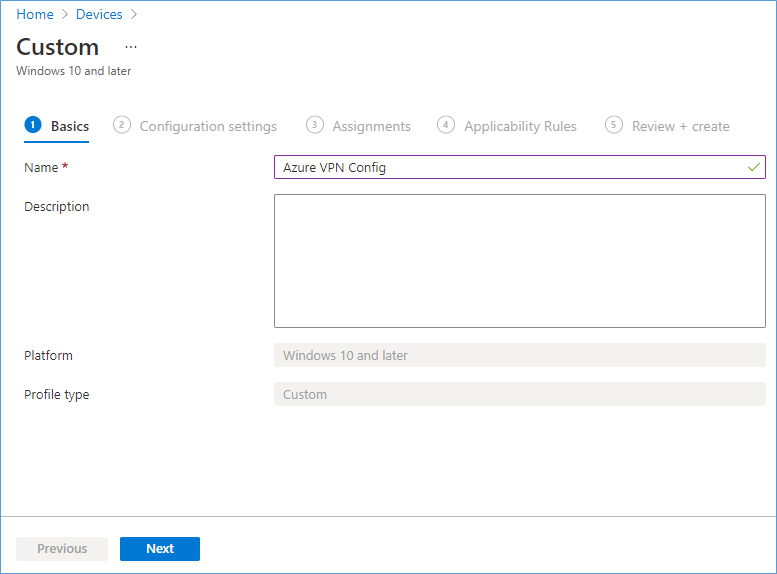
Name the Device Configuration and click Next.
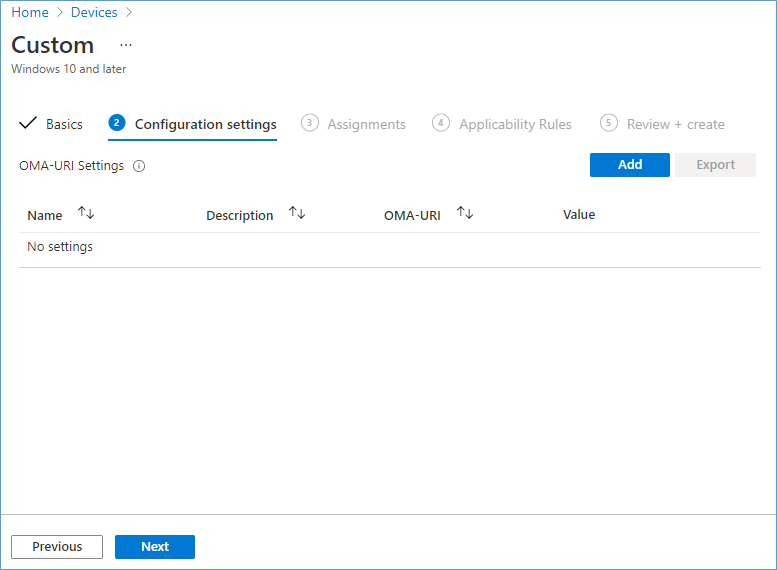
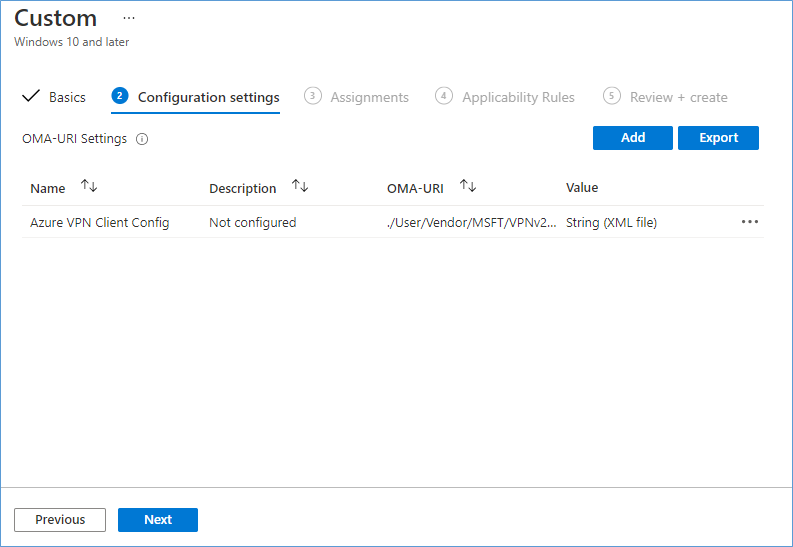
Click Add.
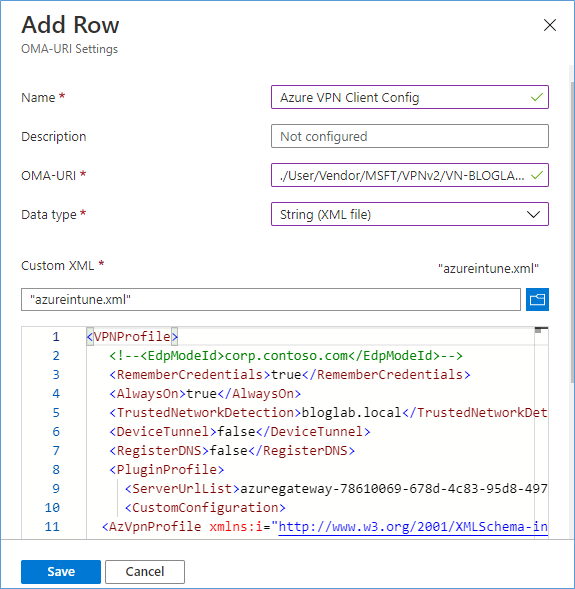
Enter a Name for the OMA-URI setting: Azure VPN Client Config
Enter the OMA-URI:
./User/Vendor/MSFT/VPNv2/<vnet name>/ProfileXML
The <vnet name> needs to be replaced with the name of the VNET you copied from the azurevpnconfig.xml in the NAME tags. (Example: VN-BLOGLAB).
Next.
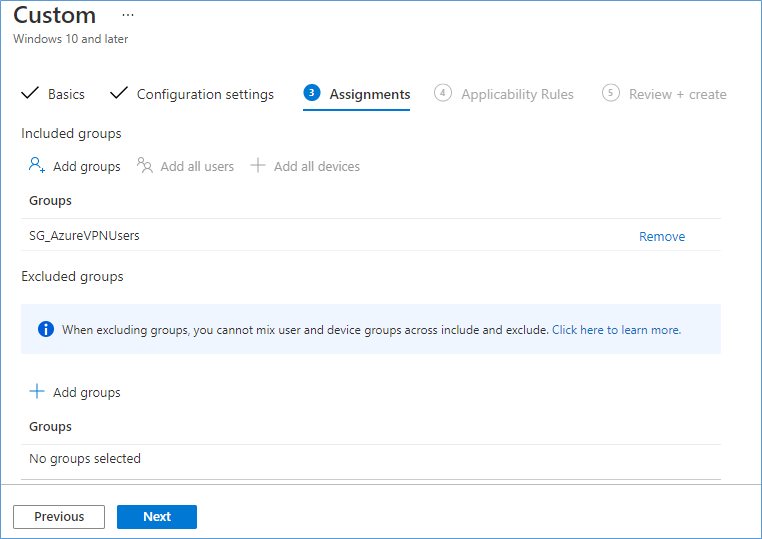
Include the same SG_AzureVPNUsers group. Next. Next at Applicability rules, then click Create.
Note: During the writing of this blog and building this solution for clients I have noticed that you cannot just change the XML in the Intune Device Configuration and hope the client will pick this up. The config will not update on the client. If for example you want to change the AlwaysON from TRUE to FALSE, you need to remove the VPN config from your client and then let Intune deploy the new config. I am not sure if this is by design or if it is a bug.
Enroll a device with the user in the SG_AzureVPNUsers group, with the correct licenses to make Intune work. Login to the device and wait for the policies and application to arrive.
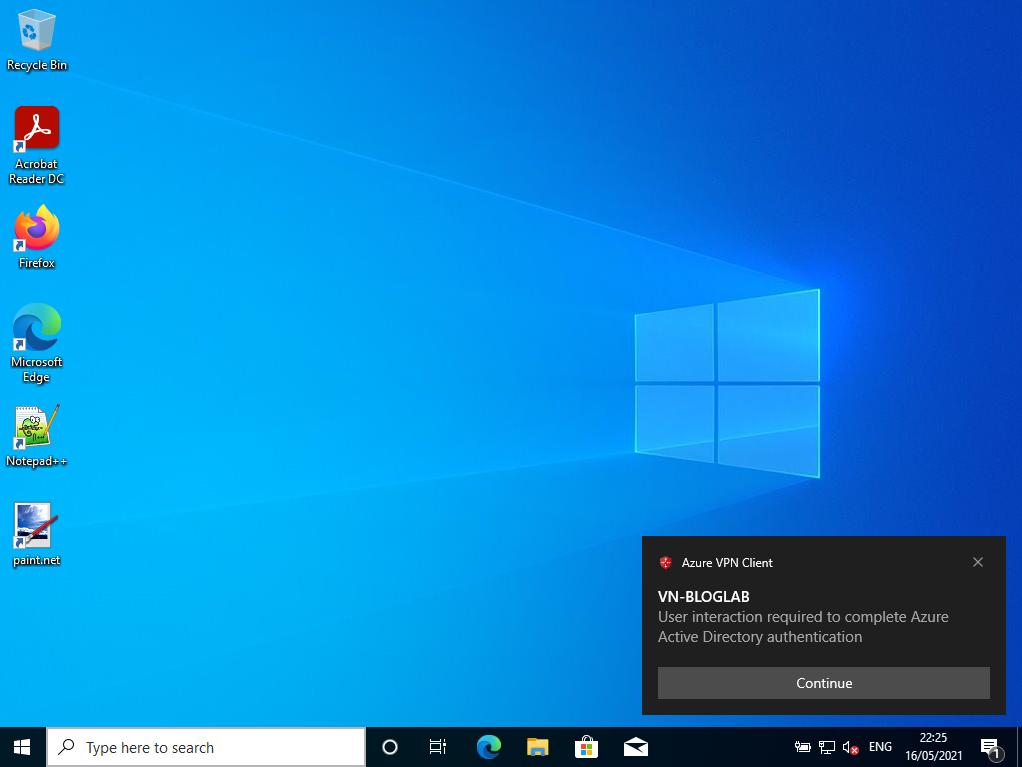
After the application and config are deployed to the client, you will get this popup. Click Continue to connect.
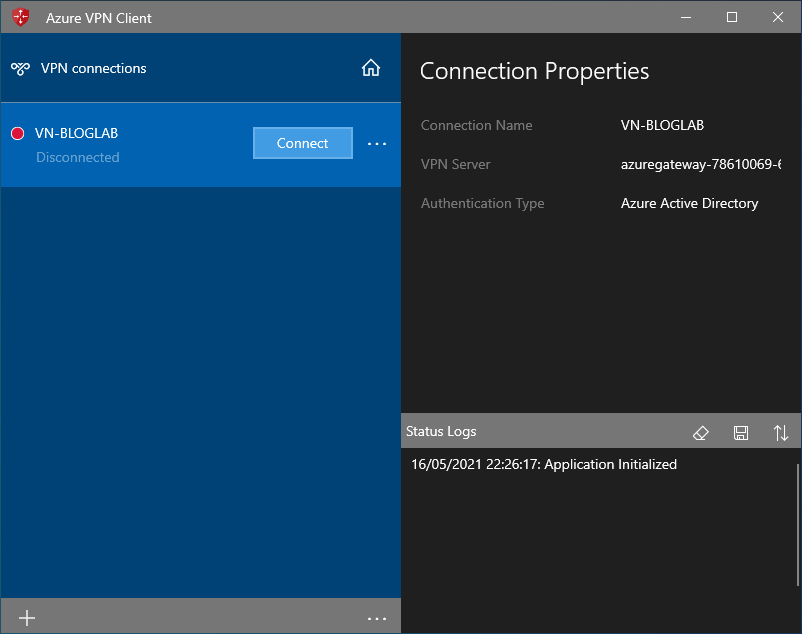
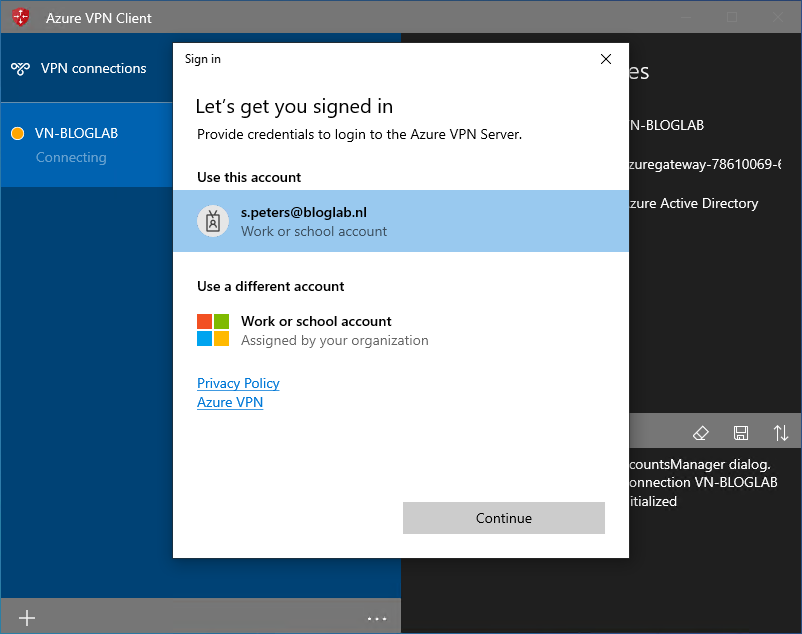
In the Azure VPN Client click on Connect.
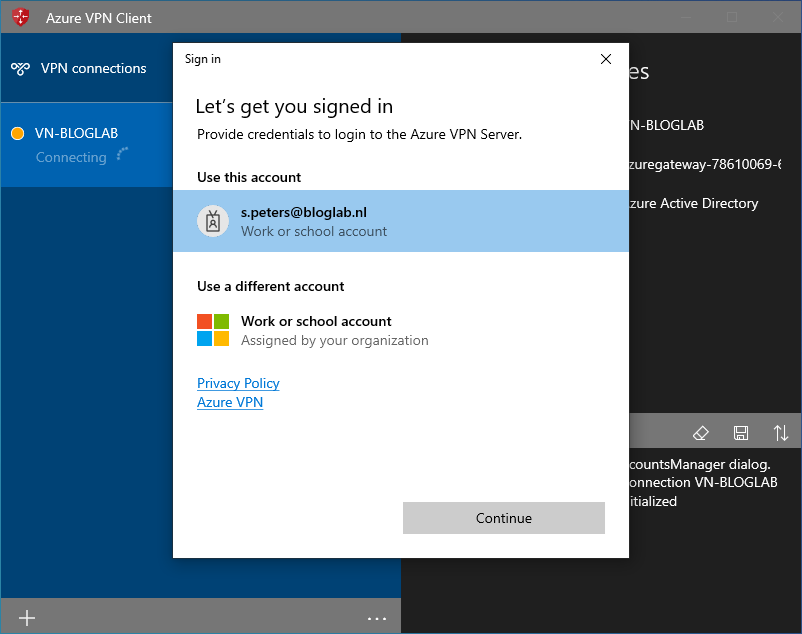
Select your account, in my example: s.peters@bloglab.nl and click Continue.
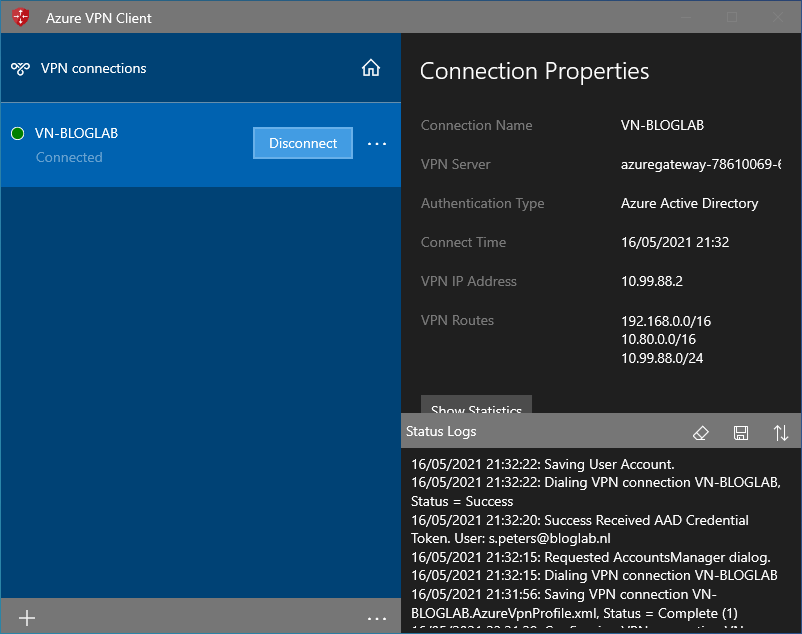
Here you go, connection is a success.
Allow Point to Site VPN to work to the on-premises network.
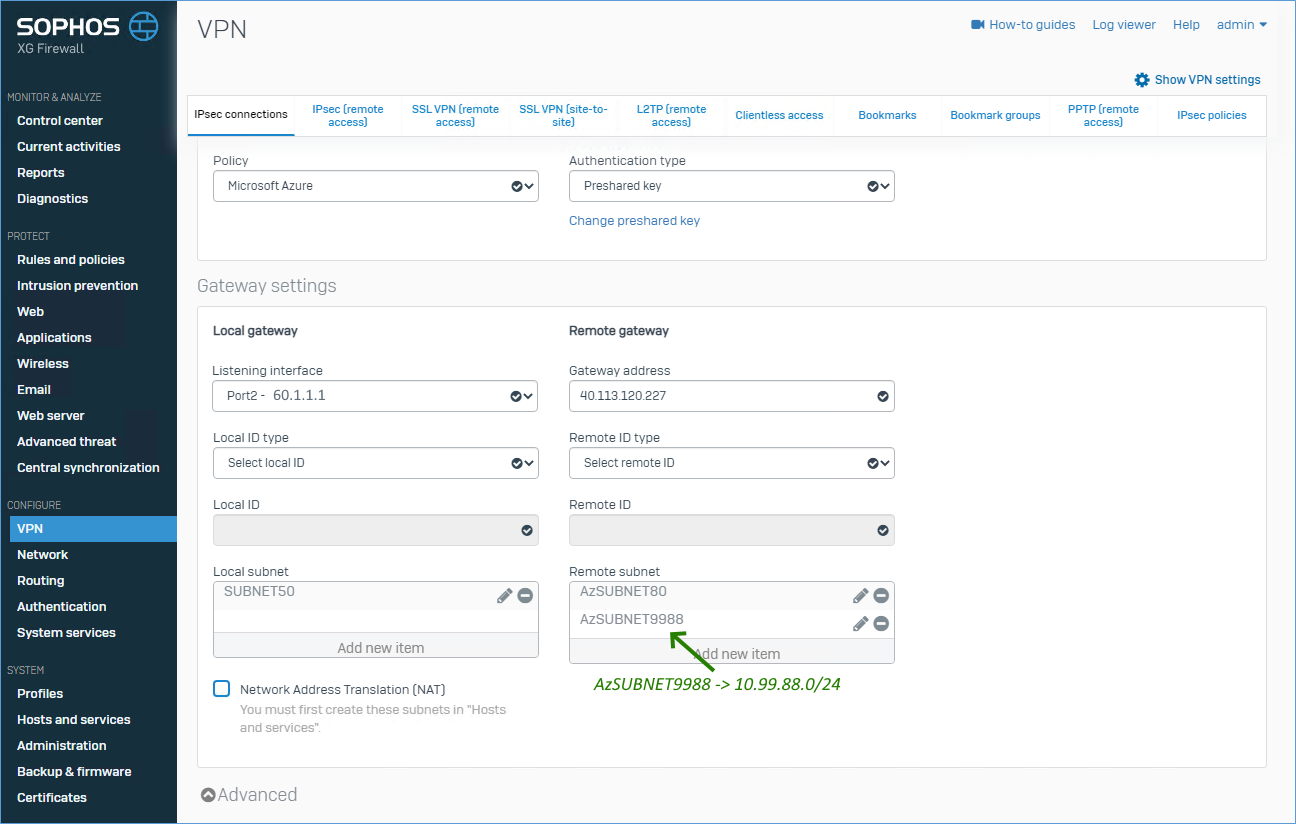
To allow traffic from the Azure VPN Client to the on-premises Server (192.168.50.10) we need to allow the Azure Point-to-Site VPN subnet 10.99.88.0/24 in the IPsec tunnel configuration as you can see in the screenshot above. For advanced configuration consult your network team and configure BGP routing.
Proof of the Pudding
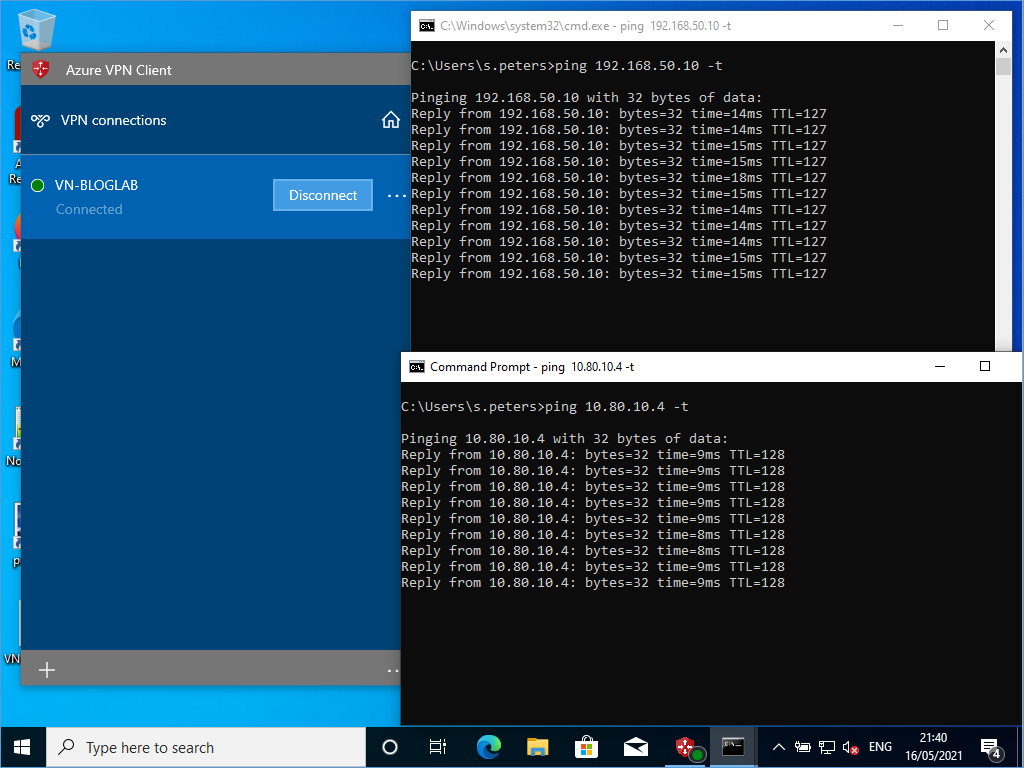
The Azure VPN Client can connect to the Azure Server (10.80.10.4) and to the LocalServer (192.168.50.10).
Configure Azure Multi Factor Authentication
The best way to configure MFA for your Azure VPN client is by using Conditional Access Policies. You can enable MFA for all Azure AD enabled cloud applications or only for Azure VPN. You need Azure AD Premium P1 for Conditional Access.
This example will show you how to configure MFA just for Azure VPN.
Login to the Azure AD admin portal as a Global Admin user: https://aad.portal.azure.com/

In Azure AD click Enterprise applications.

In the list find and select Azure VPN.
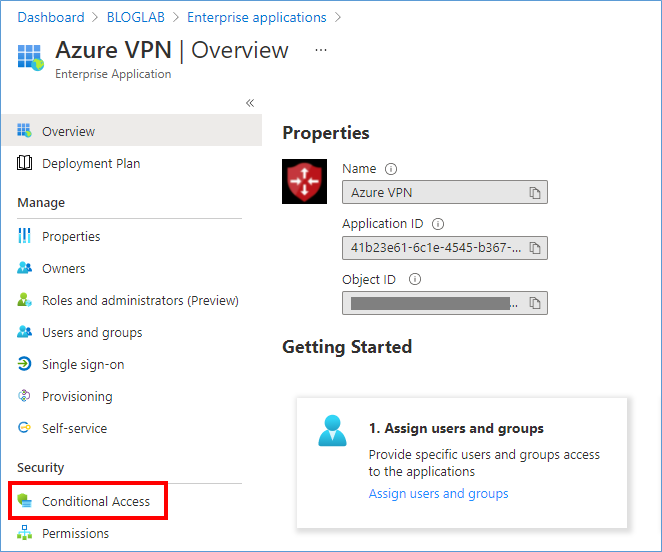
Under security click Conditional Access.
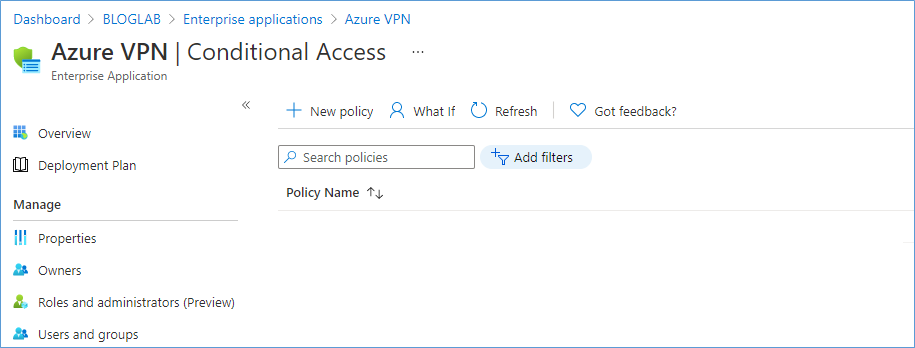
Click on the New Policy button.
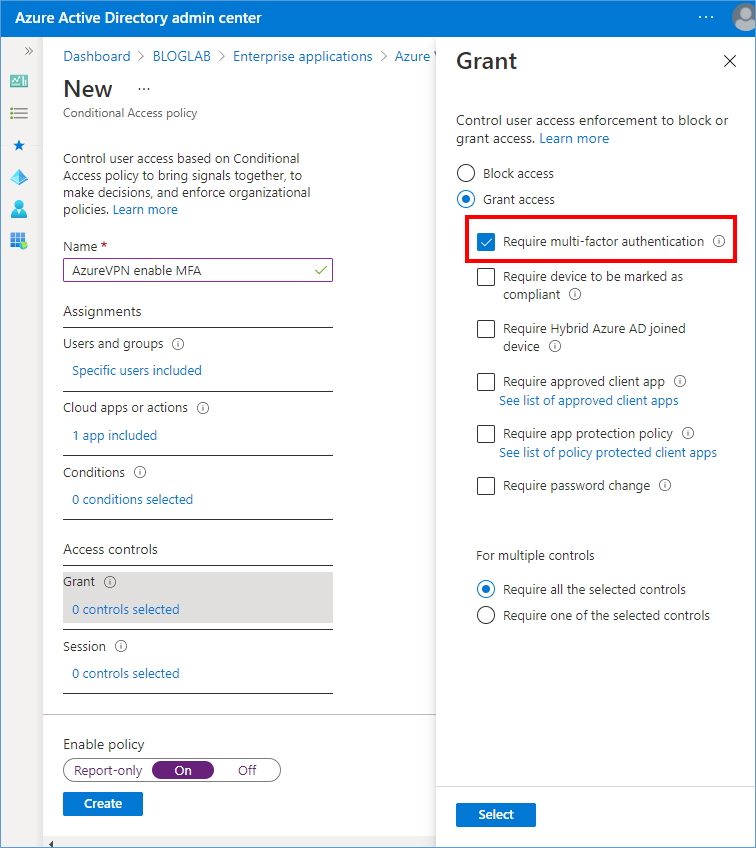
Give the policy a name and select the users or group to whom you want to apply the policies. Click on the ‘0 controls selected’ at Grant to enable MFA.
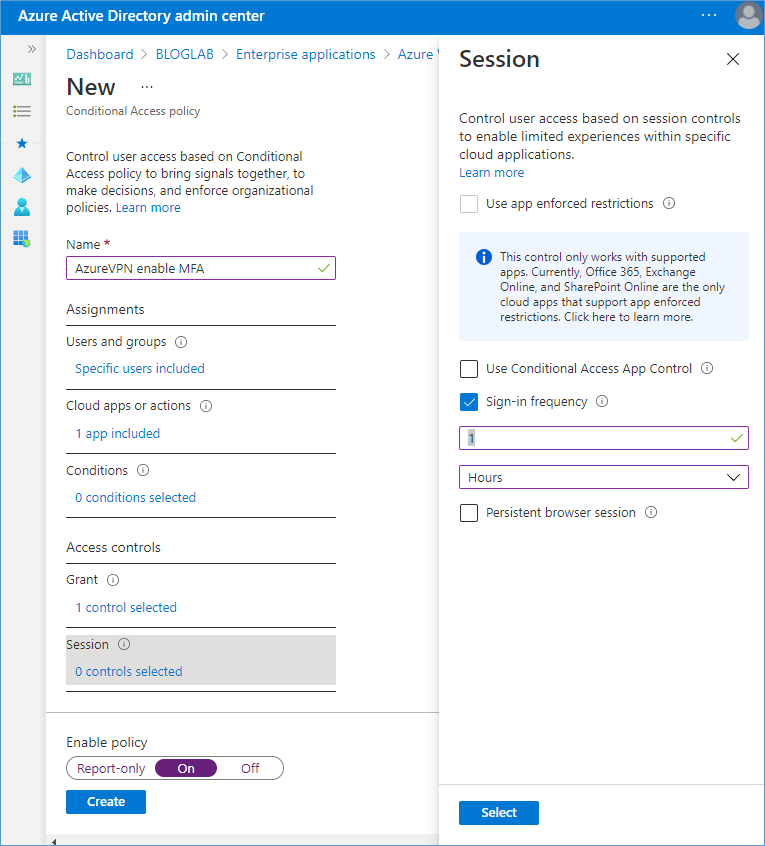
Optional: You can set the Sign-in frequency. If you set this to 1 hour, then you will have to reapply the MFA when connecting after the 1 hour has passed. This does not disconnect the session after 1 hour, or ask you for MFA every hour, it just means that if you need to reconnect for some reason and at least 1 hour has passed you will have to reapply MFA.
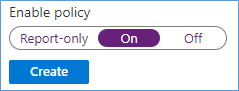
Make sure you set the Enable policy to ON.
Let’s see this in action:
In Azure VPN press connect, when the Sign in window appears select your account and click Continue.

If required enter your password and click Sign in.
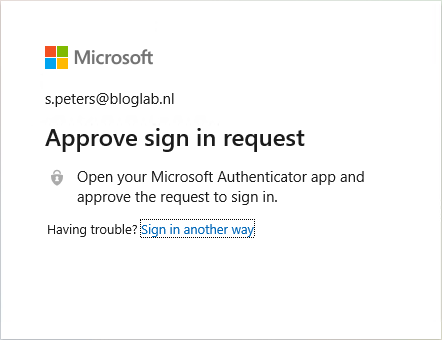
My test account is configured with Notify via App so I have to tap approve on my phone.

Connected.