This new Azure related blog describes how to extend your on-premises network to the Azure datacenter. The blog explains how to create an Azure Virtual Network, create VPN gateway, and connect it to your on-premises environment. In part 2 we expand this solution with Point-to-Site VPN, with Always ON – Azure VPN, allowing Modern Managed clients to connect via VPN to Azure Virtual Network, and if required to your on-premises network.
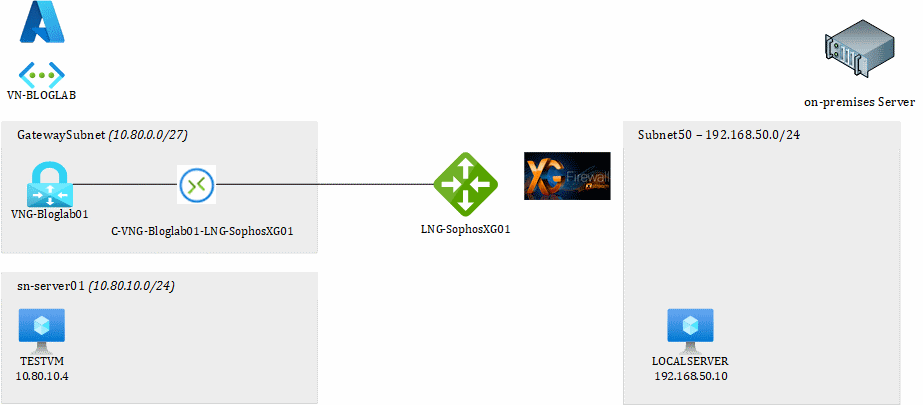
This picture shows the setup we are going to create in this BLOG.
The blog assumes you have basic knowledge about networking and how the Azure portal works. The region I usually work in is West Europe. Please adjust your region to you preferred Azure Region.
Part 1: Site-to-Site VPN
- Create Azure VNET
- Create Azure Virtual Network Gateway
- Create Virtual Machine in Azure
-
Create Site-2-Site between Azure and Sophos XG
- Configure Azure
- Configure Sophos XG
- Proof of the pudding
Coming Soon: Part 2: Azure VPN (Point-to-Site)
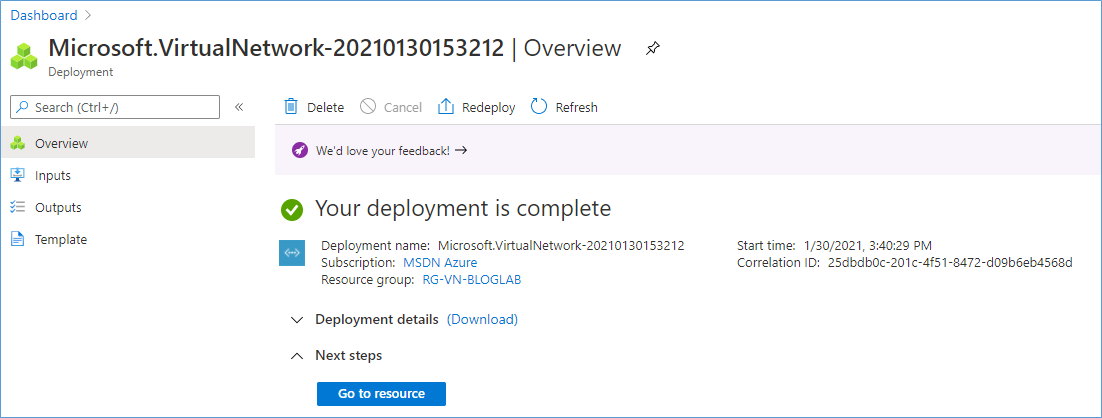
Create Azure VNET
Login to the Azure portal with Owner permissions. The URL for the Azure portal is https://portal.azure.com
Create new Virtual Network.
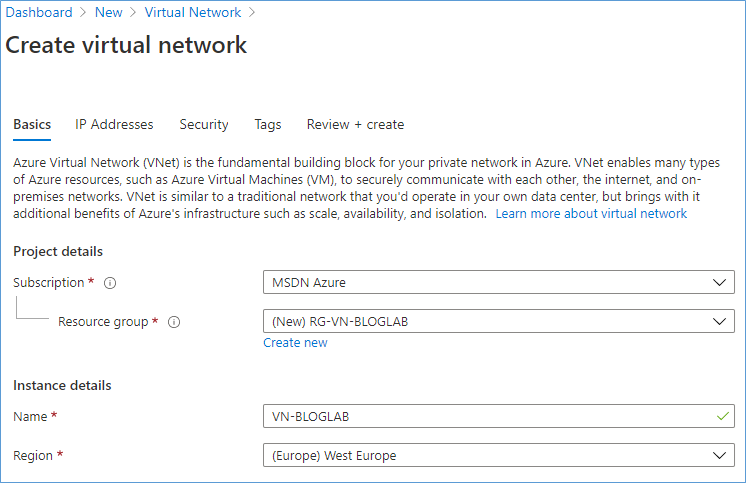
Name the resource group and the VNET.
| Property | Value |
| Resource Group | RG-VN-BLOGLAB |
| Virtual Network Name | VN-BLOGLAB |
| Location | West Europe |

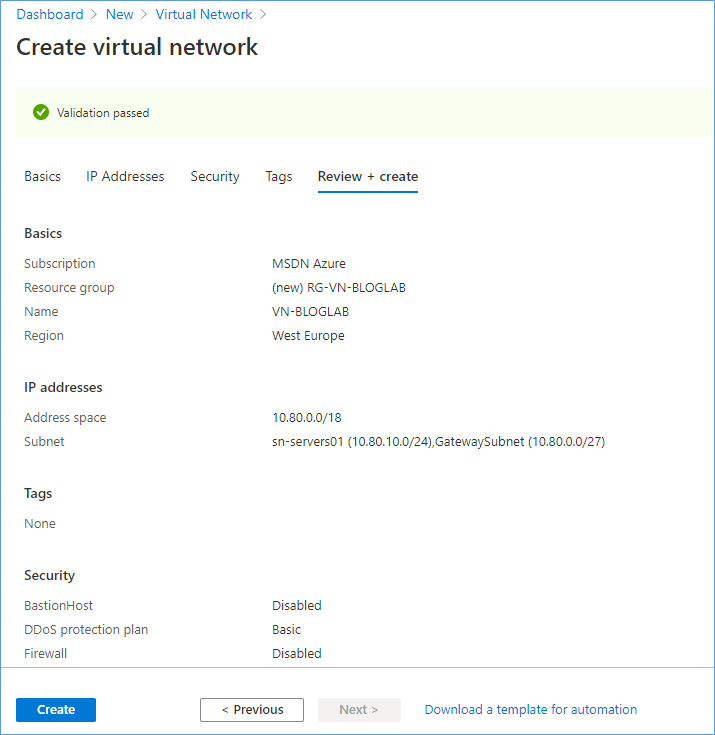
Enter an address space, in my example I choose: 10.80.0.0/18 and added two subnets:
| Property | Value |
| Subnet | IP Subnet |
| GatewaySubnet | 10.80.0.0/27 |
| Sn-servers01 | 10.80.10.0/24 |
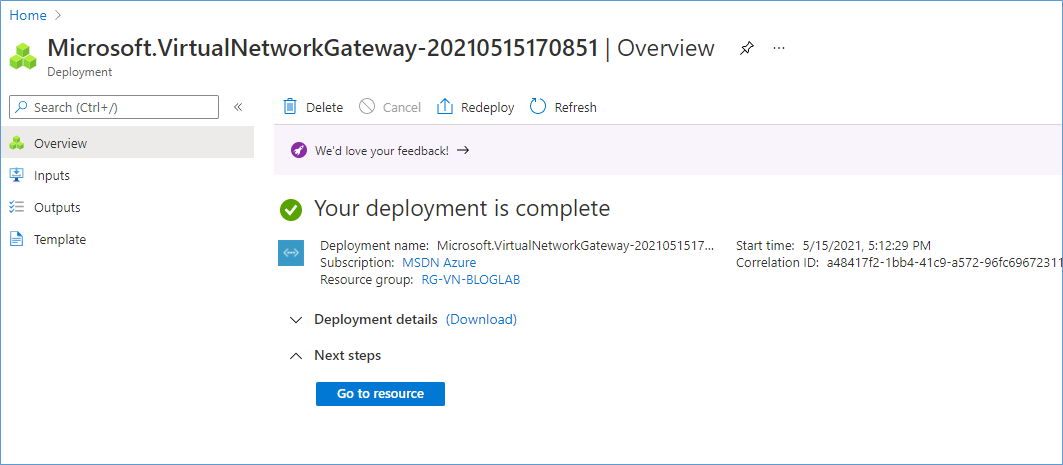
Create Azure Virtual Network Gateway
In Azure Portal click “Create a Resource” and search for “Virtual Network Gateway”.
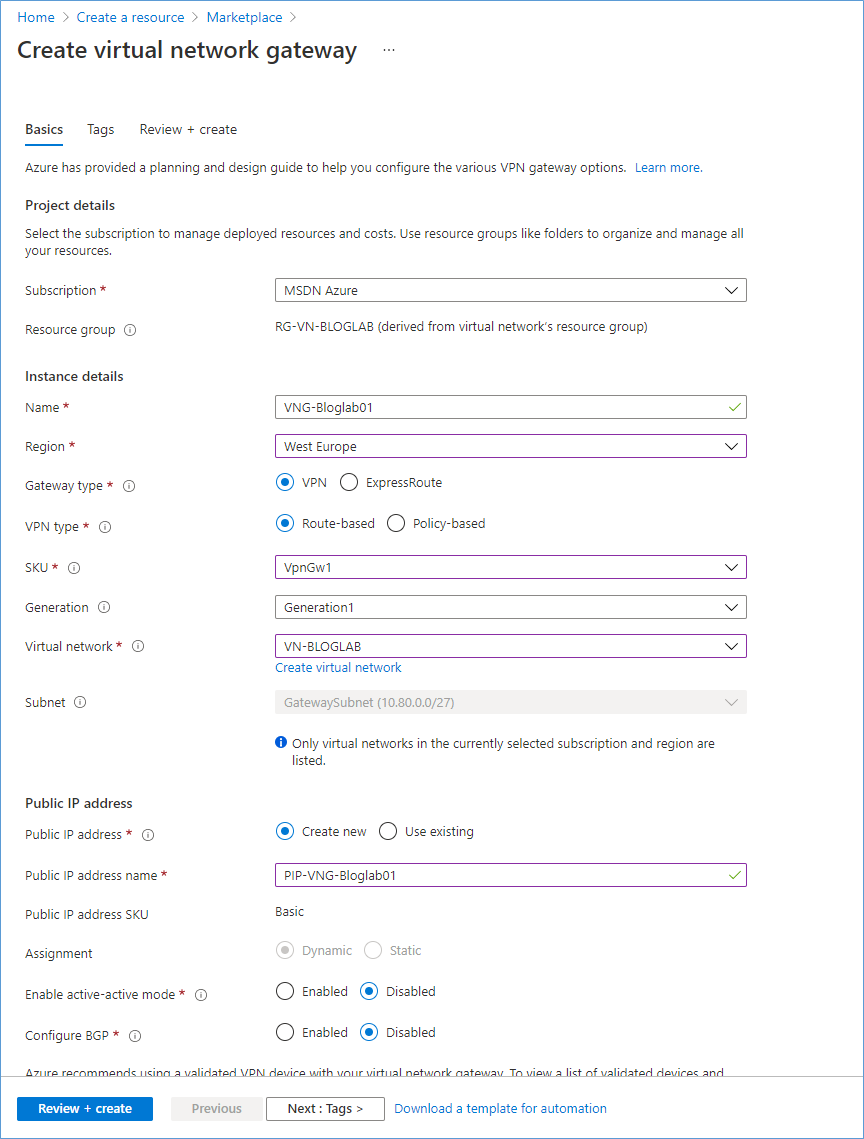
Enter all data in this form:
| Property | Value |
| Name | VNG-Bloglab01 |
| Region | West Europe (Same as network) |
| Gateway Type | VPN |
| VPN Type | Route-Based |
| SKU | VpnGw1 (overview of SKU types) |
| Virtual Network | Choose the Virtual Network created earlier |
| Public IP Address | PIP-VNG-Bloglab01 |
Click Review + Create.
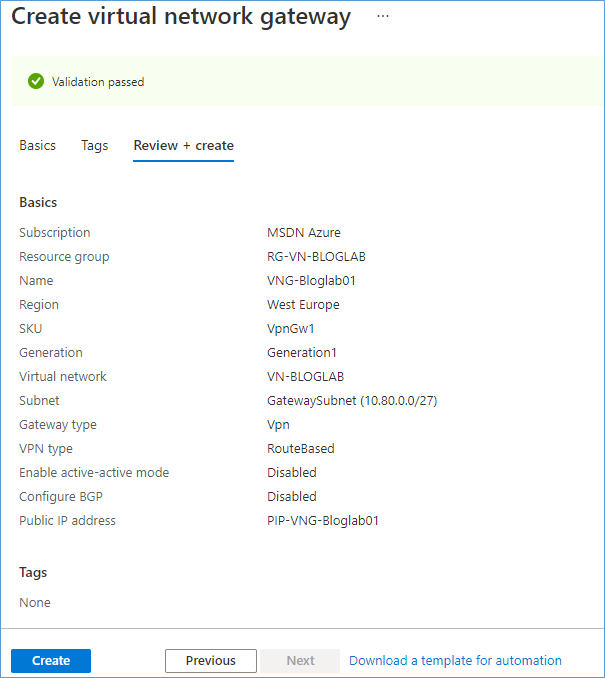
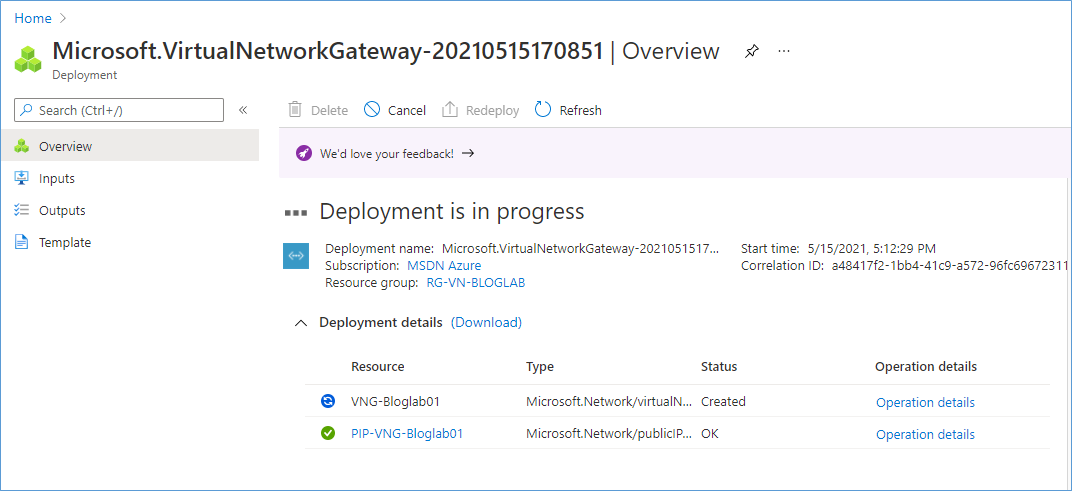
Creating the Virtual Network Gateway can take up to 45 minutes.
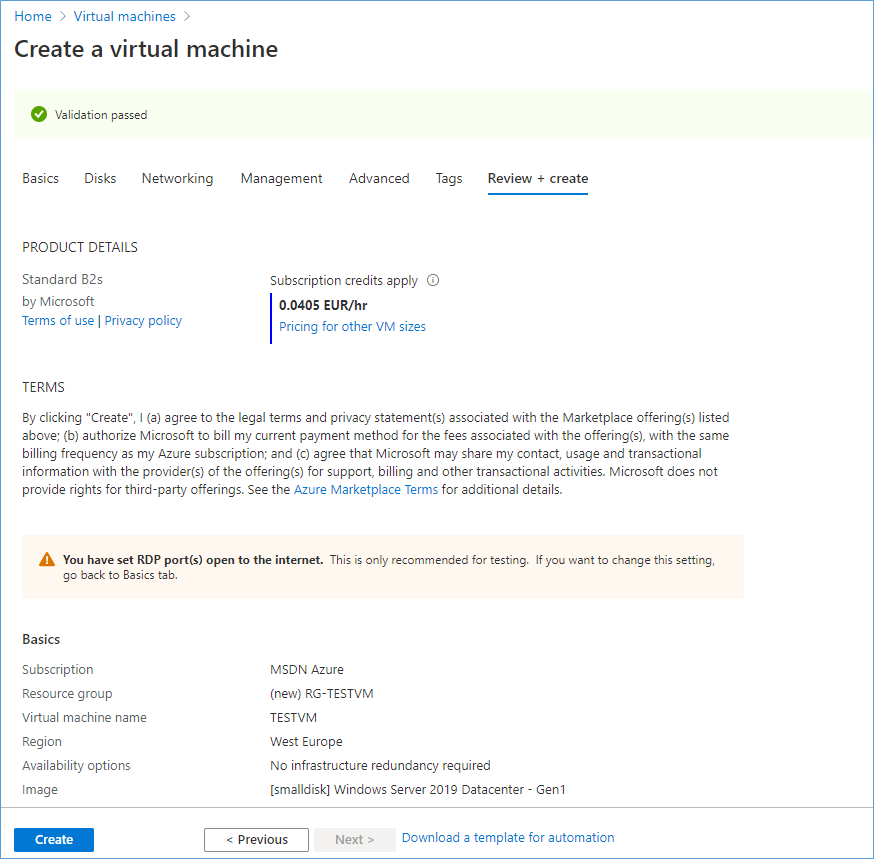
Create Virtual Machine in Azure
In Azure Portal add new Virtual Machine.
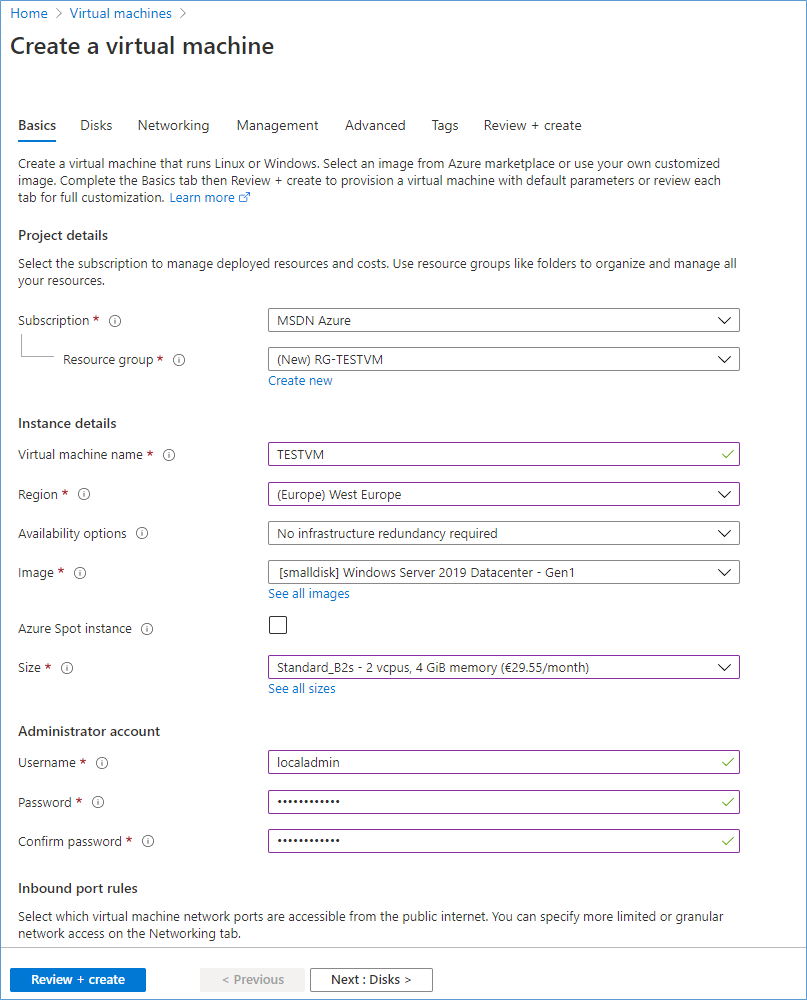
Select the same region as the Virtual Network created earlier. Enter the OS, Size and the Admin credentials.
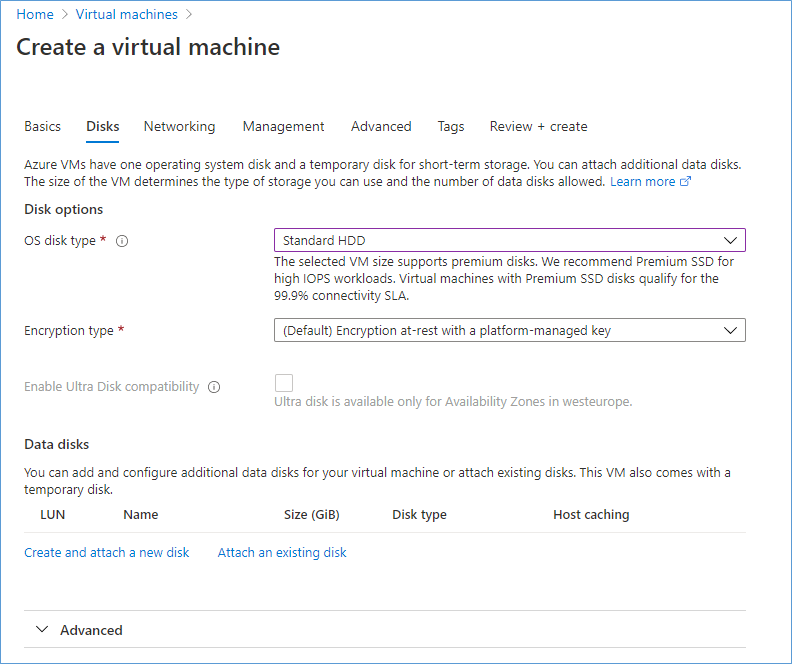
Choose an OS disk type.
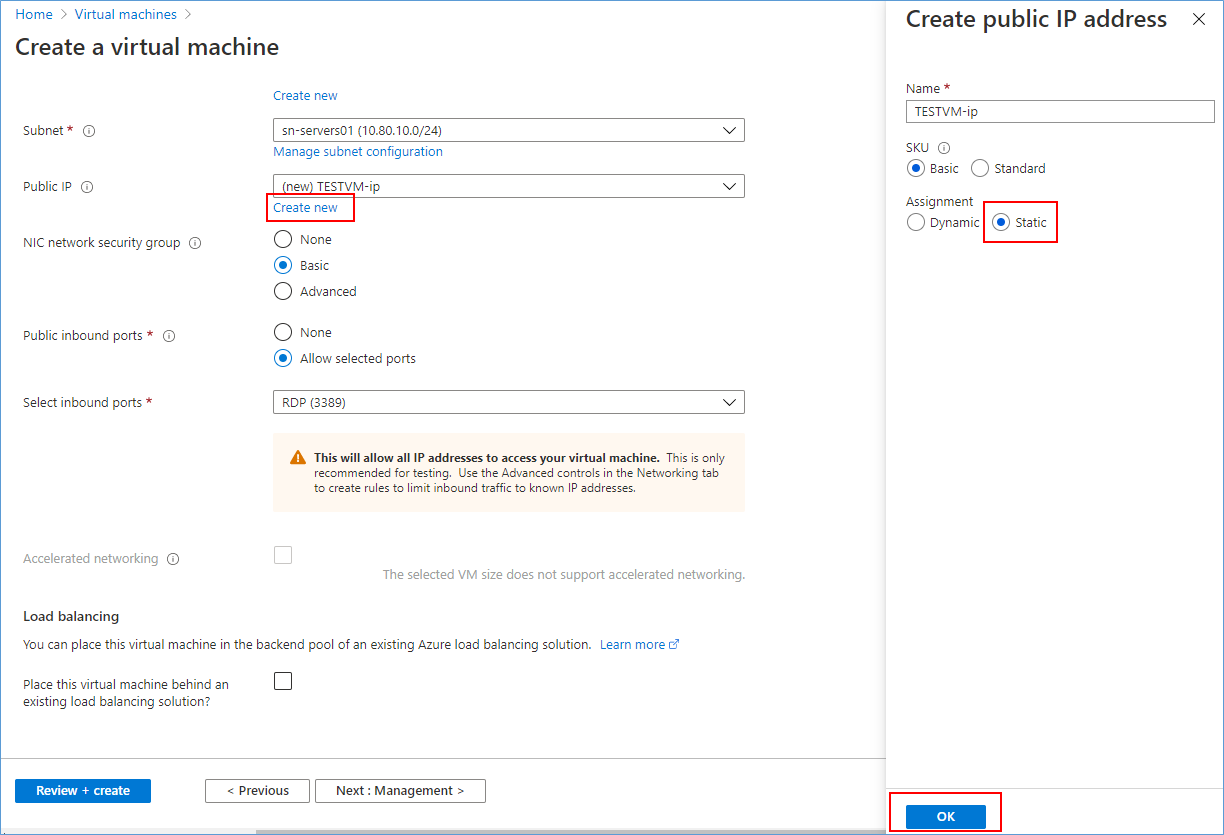
Select the Virtual Network you created earlier and select the sn-servers01 subnet. At the PUBLIC IP click “Create New” change Assignment to Static and click OK.
I recommend allowing RDP and adjusting the Network Security Group later to allow RDP only for your PUBLIC IP address.
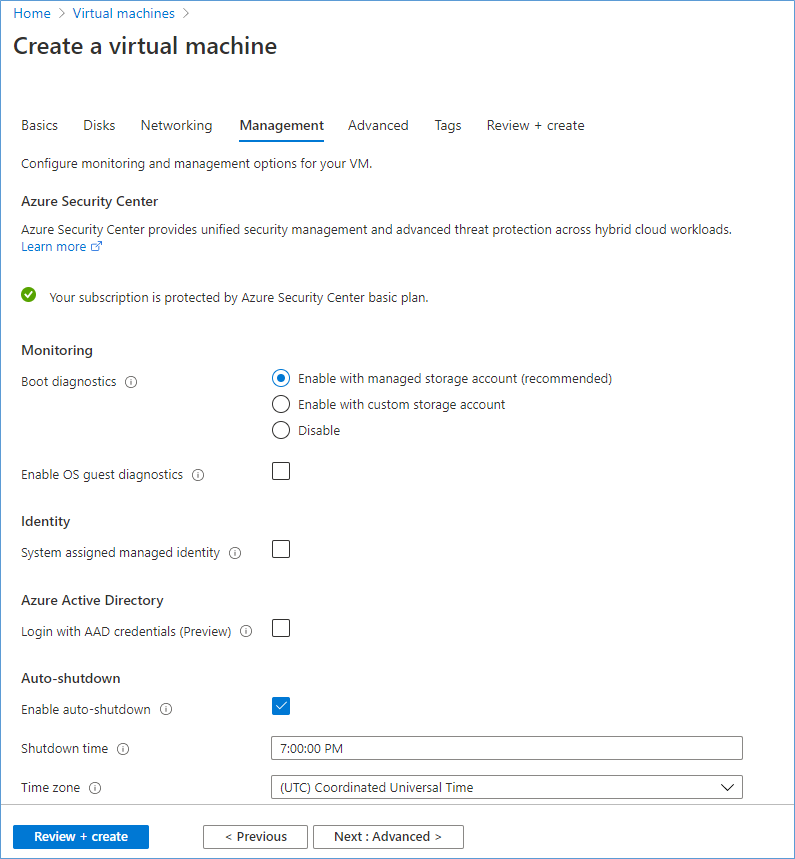
Note: Auto shutdown is enabled by default, change it if you like and click Review + create.
Create site to site between Azure and Sophos XG
In my home lab I have a Sophos XG (Free Home Edition), at time of writing it is running at version 18.0.4 (MR4). This firewall is connected to a FTTH provider in The Netherlands.
Configure Azure
First, we create the Local Network Gateway, this object represents the local VPN appliance, in my situation the Sophos XG firewall.
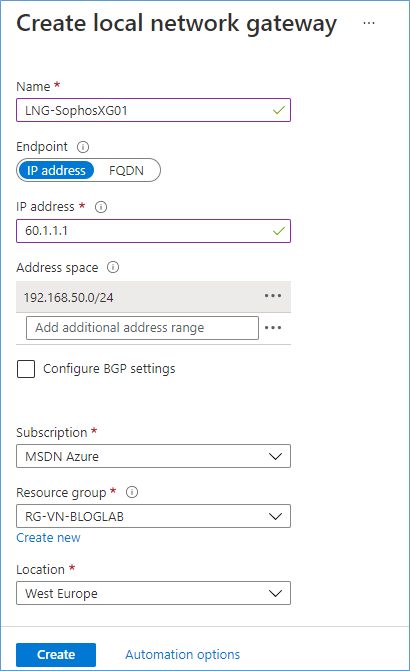
Enter a name for the object, enter the fixed public IP of the VPN appliance, and enter the local subnet or subnets which you want to transport over the VPN.
Next, we create the connection between the Local Network Gateway (your VPN appliance) and the Virtual Network Gateway (The VPN appliance in Azure).
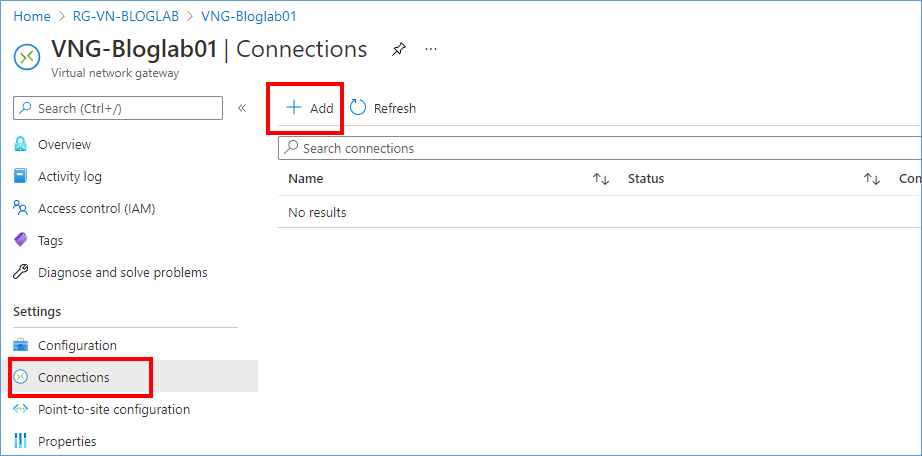
In the VNG-Bloglab01 object click the Connection button and click Add.
Enter the information in above TAB, choose connection type “Site-to-site (IPSec)”. Select your Virtual Network Gateway and Local Network Gateway object. Generate a Shared Key (PSK) and enter in this field. Click OK to make the connection.
The Azure part is now complete.
Configure Sophos XG
Before we configure the Sophos XG, we need to get the PUBLIC IP from the Virtual Network Gateway from Azure. It is displayed on the overview page of the VNG-BlogLab01. In my example the PUBLIC IP is: 40.1.1.1 (This number is an example, I changed the picture to mask the real IP)
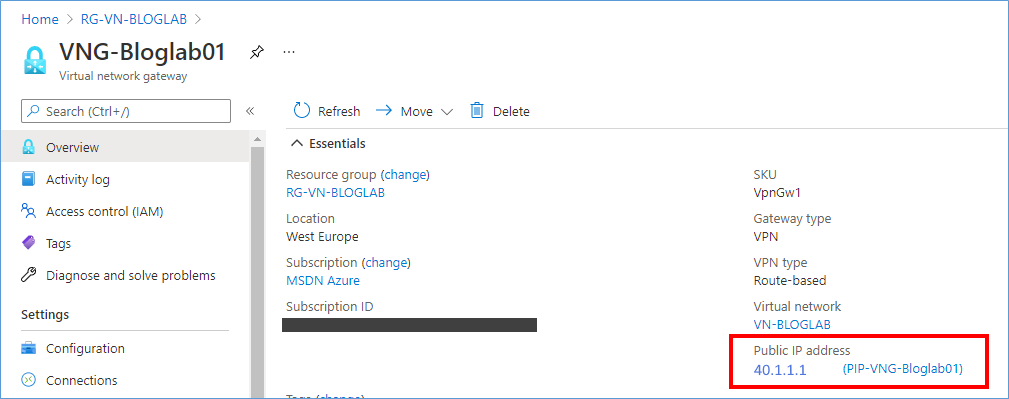
Copy the PUBLIC IP to a Notepad session for later use.
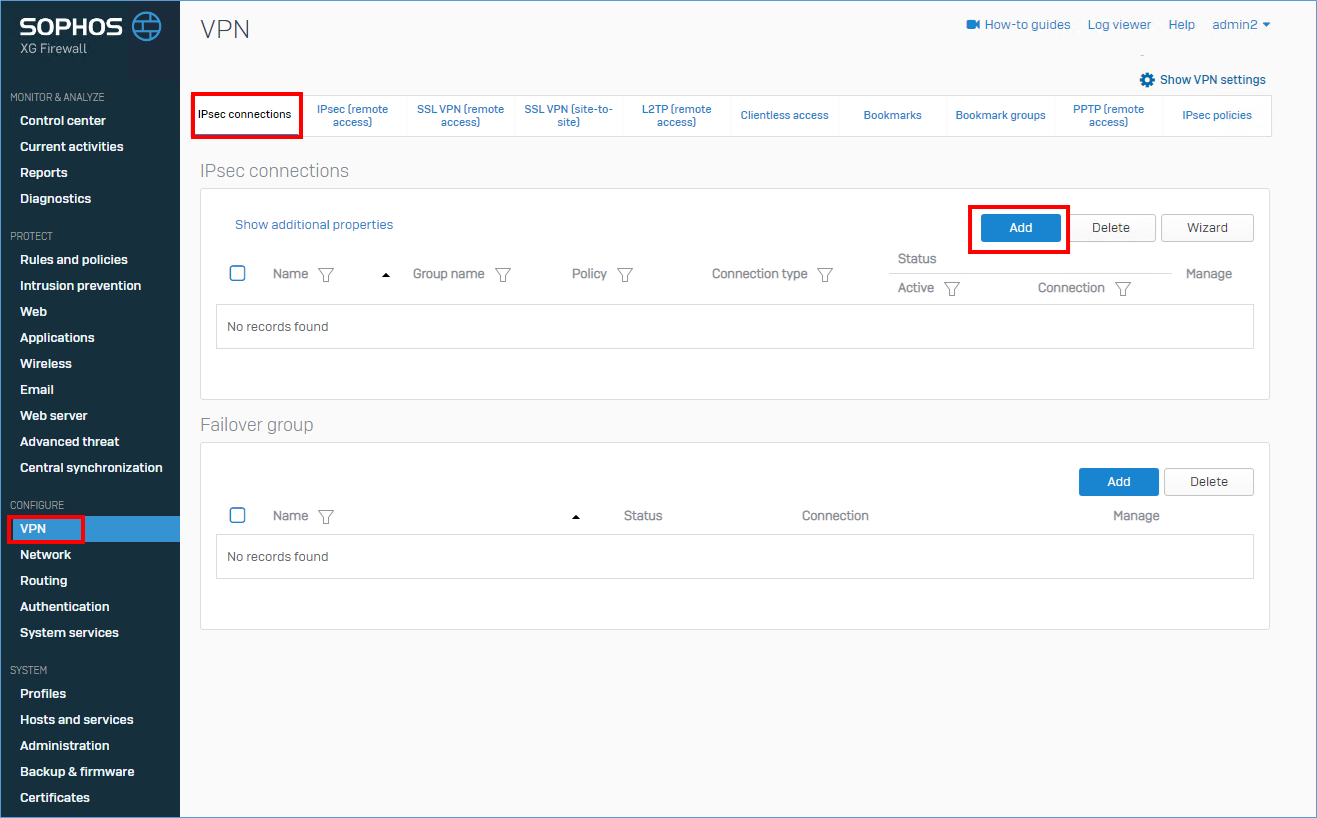
In the Sophos XG console click VPN, IPsec connection, Add.
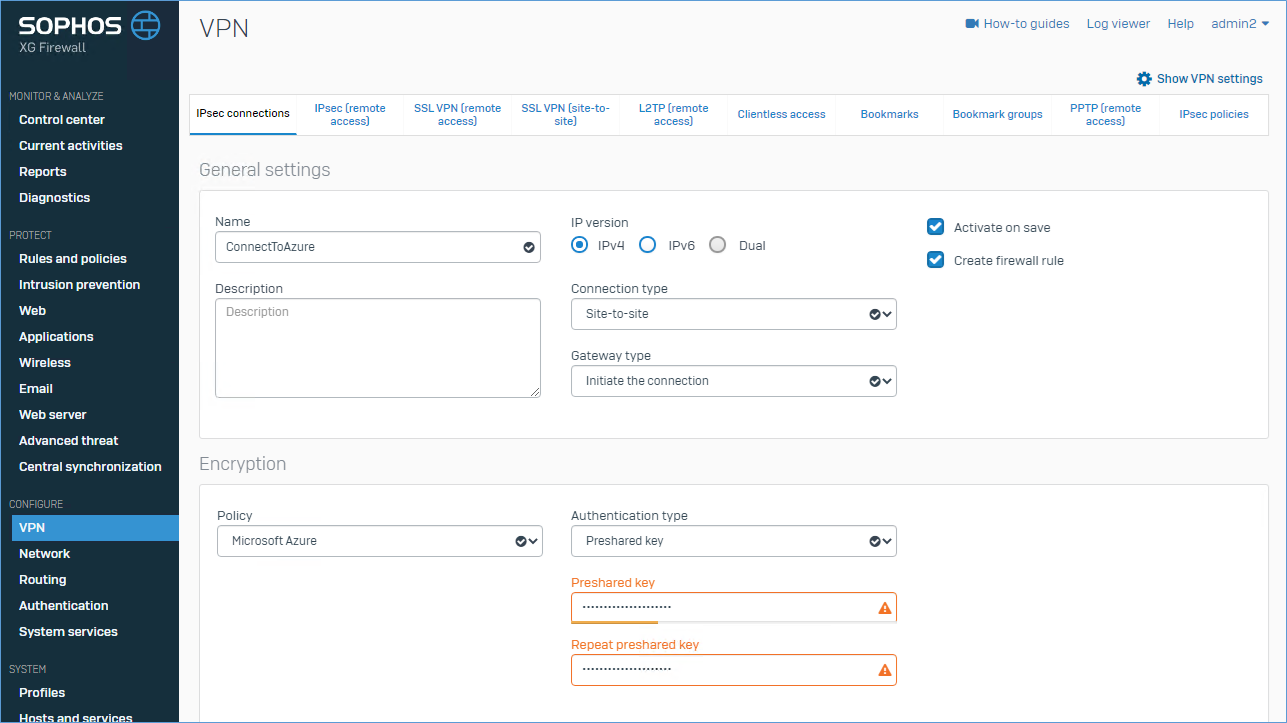
Enter a name of the new connection, at Authentication type choose Preshared Key and type/paste the same PSK as you did in the Connection. For Policy choose “Microsoft Azure” (It should be built in).
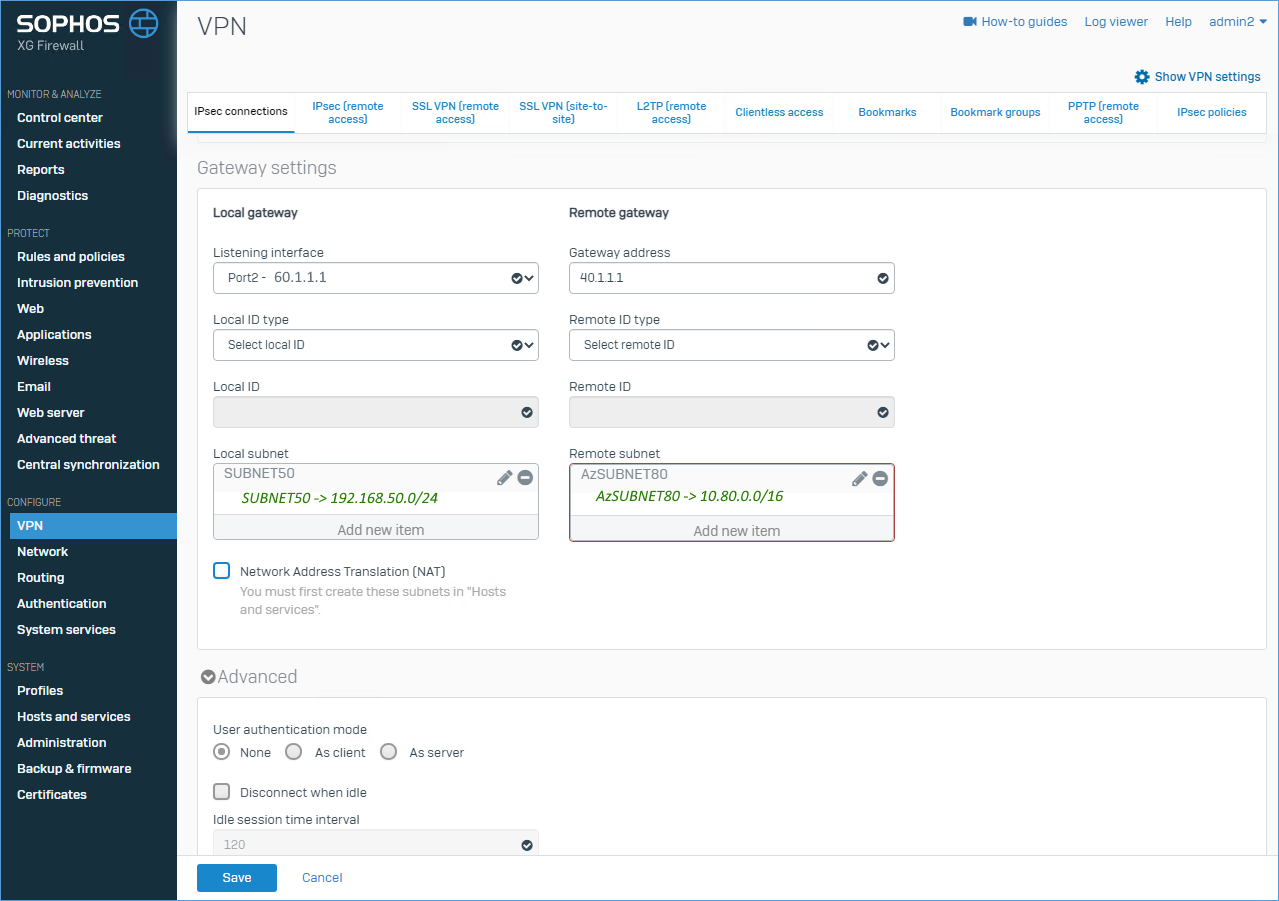
At Local Gateway choose the PUBLIC interface of Sophos XG with the 60.1.1.1 IP address. In Local subnet select the local subnet. You can create it on the fly here. I named it SUBNET50, but it contains: 192.168.50.0/24.
At the Remote gateway enter the PUBLIC IP of the Virtual Network Gateway (40.1.1.1) and enter the Address Space of the VNET in Azure. I named it AzSUBNET80, but it contains: 10.80.0.0/16.
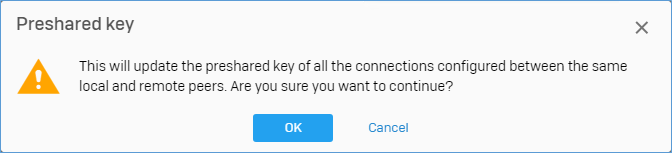
You might get this message, press OK to continue.
It can take up to a few minutes before the VPN becomes connected.
Proof of the pudding
In proof of the pudding, you will see my on-premises server called “LOCALSERVER” with IP 192.168.50.10, and the “TESTVM” in Azure with IP 10.80.10.4 and that they are able to PING each other. You have to trust me on this, I really created this environment for the blog.
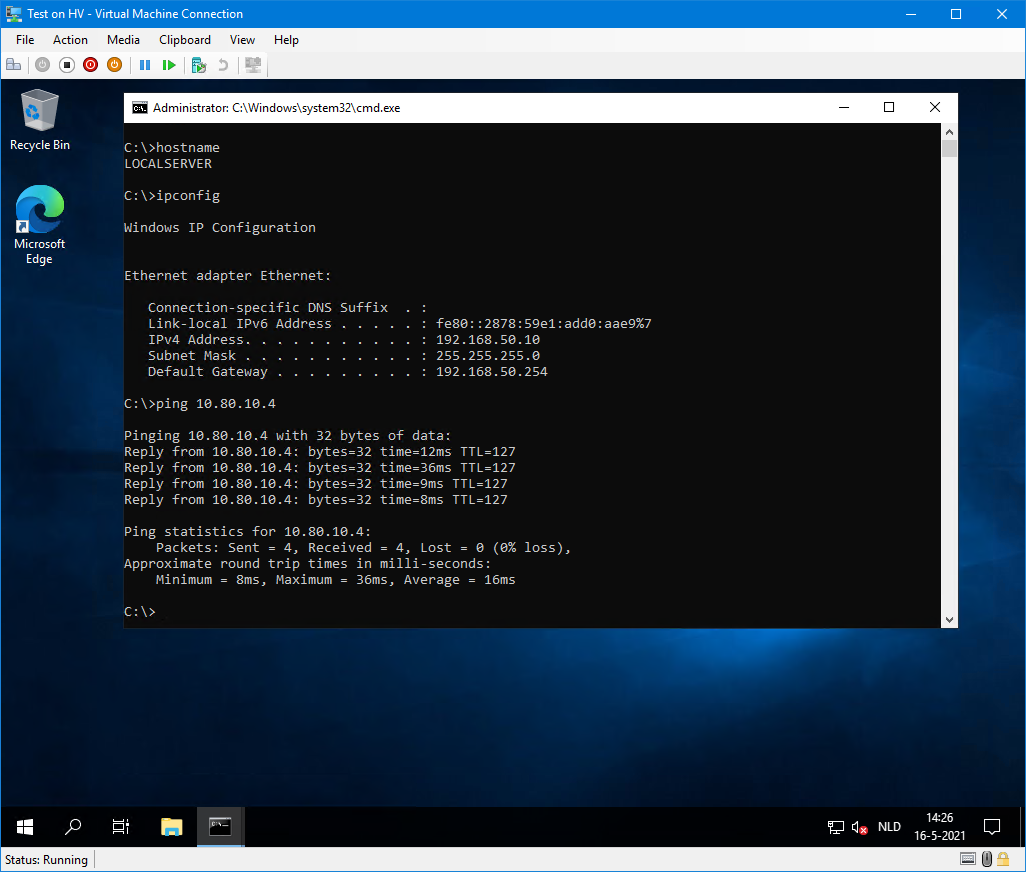
Local Hyper-V server containing Windows Server 2019 with IP 192.168.50.10 pinging to 10.80.10.4 (Azure TESTVM).

Azure TESTVM containing Windows Server 2019 with IP 10.80.10.4 pinging to 192.168.50.10 (LocalServer).
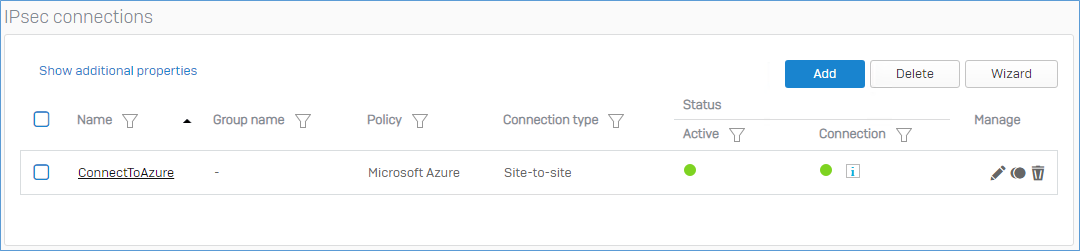
Sophos IPSec screen showing active connection (both green).
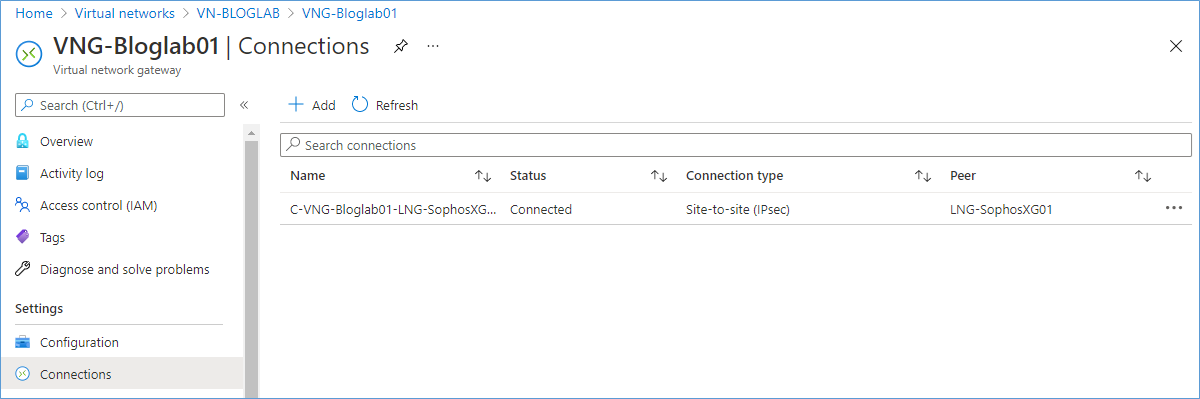
Azure Connection showing Connected.
End of part 1.
One thought on “Azure VPN – Part 1/2”