Scripts
In an earlier blogpost I explained how to install Microsoft Deployment Toolkit on a Windows Server running in Azure. This “MDT in a Box” allows you to create OS images for many purposes. To make the process easier I have developed some PowerShell scripts. The scripts where discussed in the online meetup of Dutch Windows Virtual Desktop User Group live session on December the 7th. This meetup was recorded and can be viewed here. (not available yet)
Three of them are listed here.
- MDT_Deployment_v2.ps1
- LTImdtimageversion.ps1
- Tosysprep.ps1
These scripts work very well with the MDT in a Box machine I created (see this page for instructions on how to create that). For instruction on how to install these scripts in your MDT environment check this section below!
MDT_Deployment_v2.ps1
This MDT Deployment script helps you run MDT task sequences easier. It will take out some of the manual tasks you need to perform, like creating Hyper-V machines, converting Dynamic VHD to Fixed VHD and uploading VHD files to Azure Storage Accounts. It also creates an “mdt_imageversion.txt” file in your MDT folder to be picked up by “LTImdtimageversion.ps1”
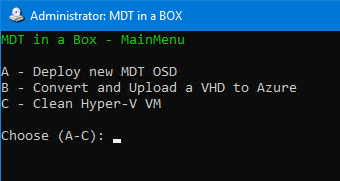
The script provides an easy frontend to take over some manual labor.
Menu Options:
- Creates a local Hyper-V VM, puts memory, hard disk, and CPU’s in it, attaches the BOOT ISO file and starts the VM. Also, it generates a version file to be used by the script “LTImdtimageversion.ps1”
- Converts the dynamic VHD file from a VM to fixed VHD and uploads it to an Azure Storage Account.
-
Deletes a Hyper-V VM created by option A and its files/folders.
The script can be downloaded here.
Copy the script anywhere on you MDT server, customize the variables in the first section of the script and you are good to go!
LTImdtimageversion.ps1
This script is very simple, it will copy a file from your MDT share to the local system where the MDT Task sequence is running. The file copied is created by the script “MDT_Deployment_v2.ps1”
The script can be downloaded here.
To Sysprep or Not to Sysprep
The Tosysprep.ps1 script is created because sometimes I am monitoring the deployment of a machine and I want to make some changes before the SYSPREP is executed. This script allows you to automate the SYSPREP process, but if you see something strange happen during the OS Deployment you can cancel out the SYSPREP and make some manual changes to the image before you run SYSPREP.
The script can be downloaded here.
Create MDT task sequence
This section explains how to configure a task sequence to use LTImdtimageversion.ps1 and Tosysprep.ps1. In my MDT environments I have multiple task sequences. I usually create at least one task sequence for installing applications, some times more than one. Since I use the Tosysrep.ps1 I also created a task sequence for sysprepping. And of course, a task sequence for the OS deployment itself.
Example of my Task sequence: “WVD20H2 Customer 2” – OS Deployment
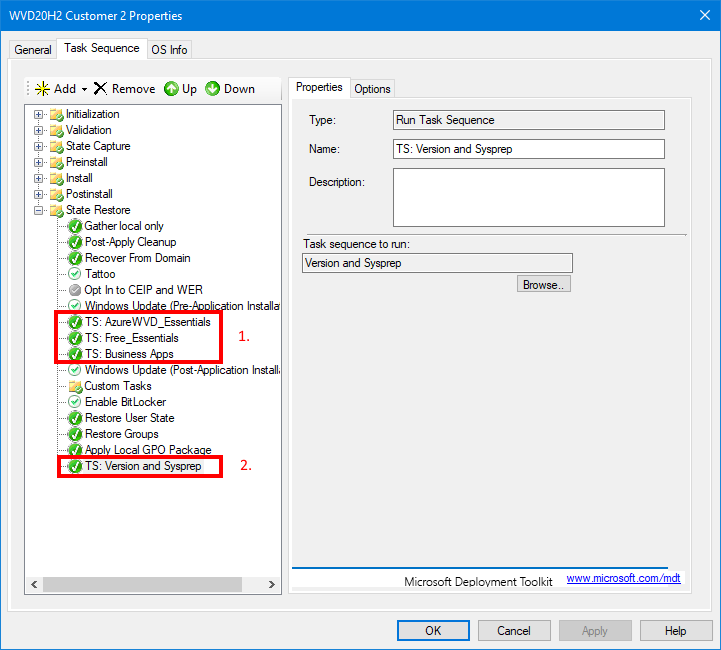
The items that are marked red are also task sequences that are executed from the main OS deployment task sequence.
Box 1 contains three separate task sequences for installing Azure WVD essentials, like the Azure VM agent, the “Free Essentials” contain free applications, like Firefox, Chrome, Adobe Reader, 7Zip etc, and the Business_Apps contains business applications, like Office 365, Teams, OneDrive and can also contain Line of Business applications. It is out of scope for this blog.
The box 2 task sequence runs a few scripts to allow automatic sysprep and to mark the image with a version number using the LTImdtimageversion.ps1 script.
This section only explains box 2. I combined the version script and the sysprep script in one tasksequence.
Create the task sequence
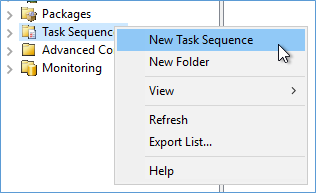
Start the MDT Deployment Workbench, right click Task Sequences and click New Task Sequence.

Give the task sequence an ID and a name. Click Next.
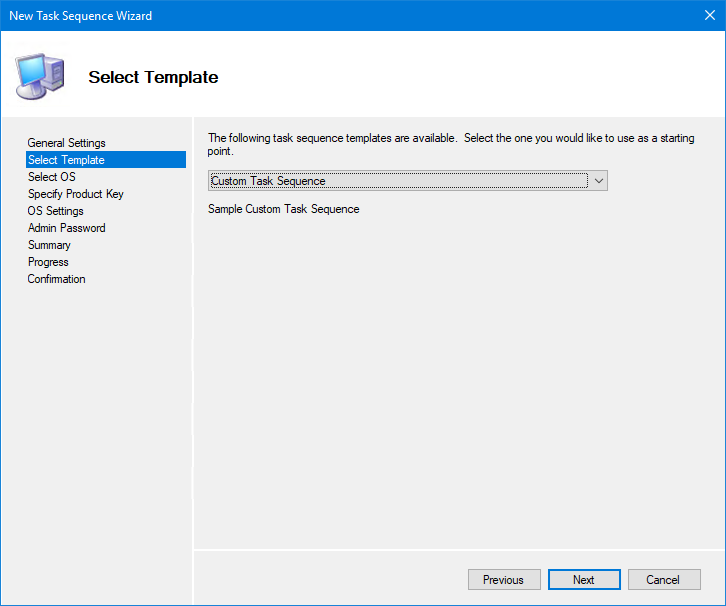
In this dropdown list choose “Custom Task Sequence” and click Next, Next, Finish.
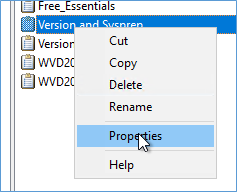
Right click the new task sequence and click properties.
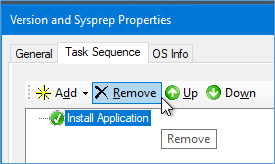
Switch to the tab “Task Sequence” and remove the default “install application” item.
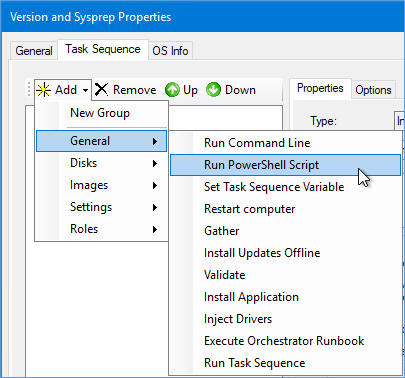
Click Add, General, Run PowerShell Script.
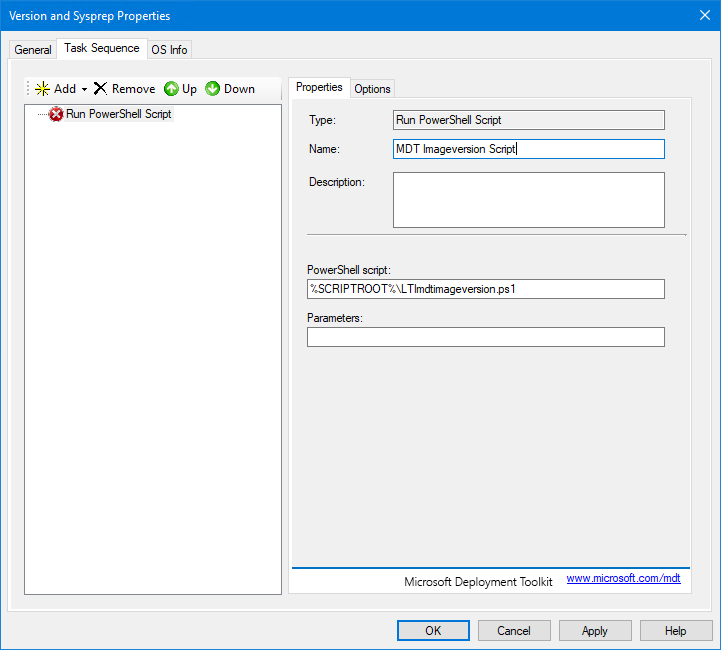
Enter a Name for the script “MDT Imageversion Script” and enter the command: %SCRIPTROOT%\LTImdtimageversion.ps1
Make sure you have copied the downloaded script to the SCRIPTS folder in your MDT Deployment Share.

Next click Add, General, Run Command Line
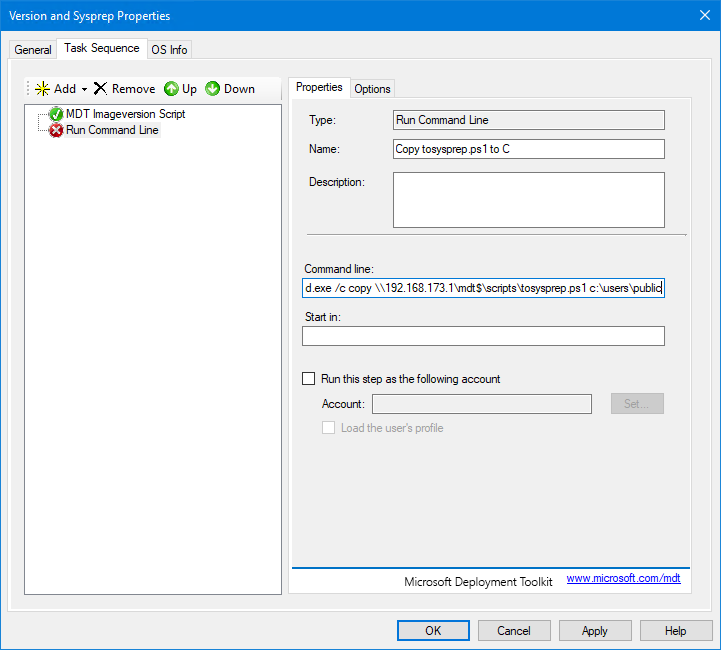
Enter a name for the commandline “Copy tosysprep.ps1 to C” and enter this command: cmd.exe /c copy \\192.168.173.1\mdt$\scripts\tosysprep.ps1 c:\users\public
Make sure you change the IP number or paths to your environment.
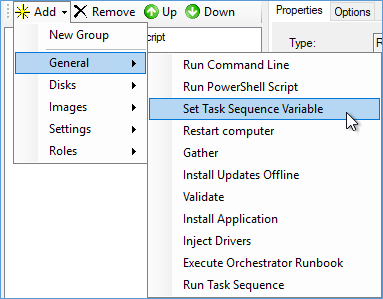
Next click Add, General, Set Task Sequence Variable
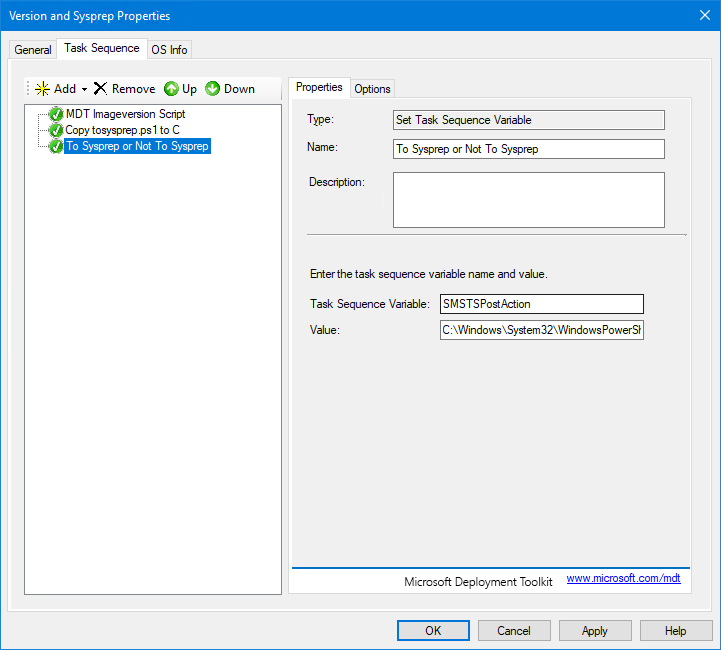
Enter a name for this task sequence variable “To Sysprep or Not To Sysprep”
Enter this task sequence variable SMSTSPostAction like in the screenshot.
Enter this in the value: C:\Windows\System32\WindowsPowerShell\v1.0\powershell.exe -ExecutionPolicy Bypass -File “C:\Users\public\tosysprep.ps1”
If you changed the location of the tosysprep.ps1 file a few steps back, then align the paths here.
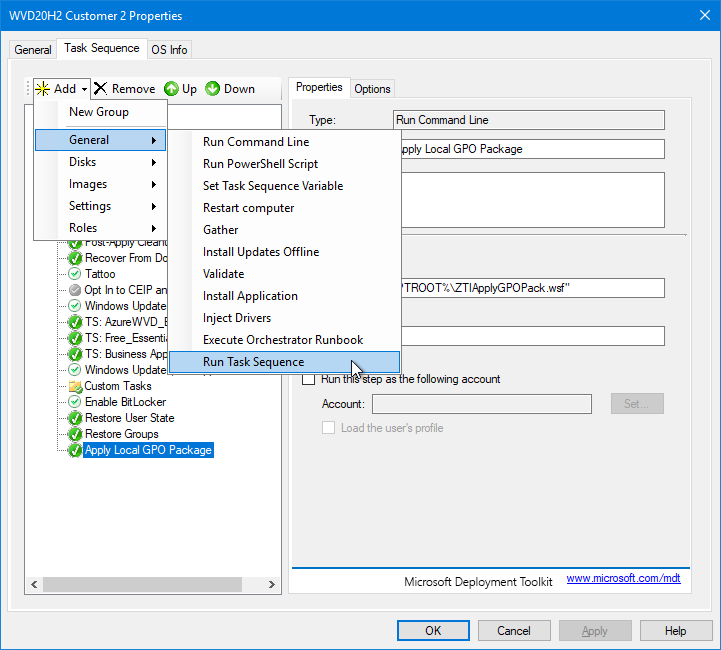
In your OS Deployment task sequence select the last item in the list, click Add, General, Run Task Sequence.
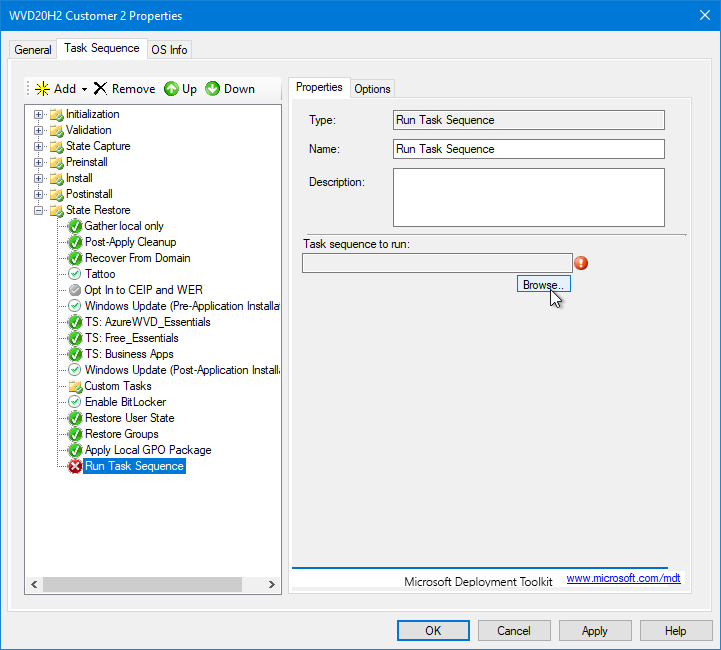
Click on the Browse button.
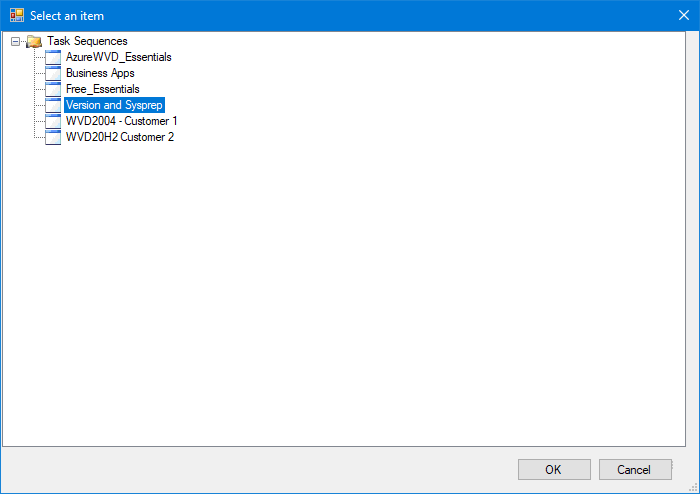
Select the task sequence “Version and Sysprep” and click OK.
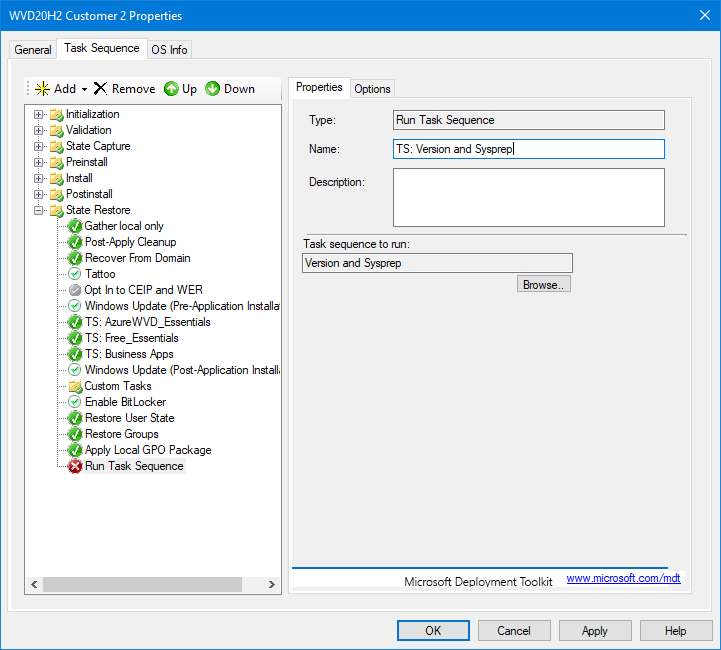
Name the task sequence “TS: Version and Sysprep”. Click OK.
When you start a new OS deployment at the end of the journey it will copy the “mdt_imageversion.txt” from the MDT folder into the image and execute a sysprep. This sysprep will start after a countdown of 600 seconds (default).

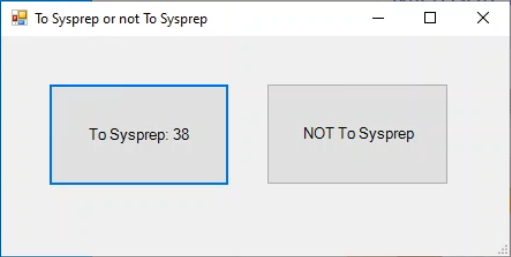
When this Windows appears, you have three options:
- Ignore it, then the sysprep will start automatically.
- Click the “To sysprep” button, then the sysprep will start immediately.
- Click the “NOT to Syspep” button, then the script aborts and will delete itself. No sysprep is run automatically.
Have fun building your images!