Introduction
When creating a workplace for your users in Azure using RDS or Windows Virtual Desktop you might recognize this issue. All servers in Azure use a dynamic outbound IP for browsing. When you need to access websites that require IP whitelisting this can be an issue.
You can use multiple solutions for this problem:
- Route your internet traffic back to on-prem via ExpressRoute or VPN
- Use Azure Firewall, or a virtual firewall appliance (can be costly)
- Use a self-build outbound NAT VM
This blog will explain how to build your own outbound NAT VM for your Azure virtual net. Although this is not Enterprise ready it will work just fine. Determine production readiness for yourself.
Requirements
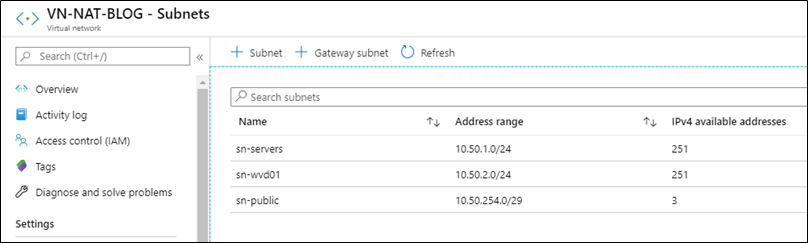
This blog post assumes you have an Azure VNET with multiple subnets. And at least a few Windows Servers. Below is the setup created to write this blog. In this setup I have no connection to on-prem network, so cloud only.
For the NAT to work as in this blog I create a rather small “public” subnet. It only needs one IP number in this subnet, so the /29 is more than enough.
Address space: 10.50.0.0/16
Create two Windows Virtual Machines: Size/HDD doesn’t matter you can change it later.
| Name | IP | Subnet | Public IP | |
| VM-BACKEND | 10.50.1.4 | sn-servers | Yes, for RDP/steppingstone to WVD01 | |
| VM-WVD01 | 10.50.2.4 | sn-wvd01 | no | |
I call the VM ‘VM-WVD01’ but I have not configured WVD for this blog, it is just Windows 10 VM running in this subnet. The principles are the same.
Next, we need to create the NAT virtual machine.
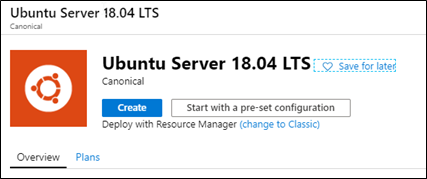
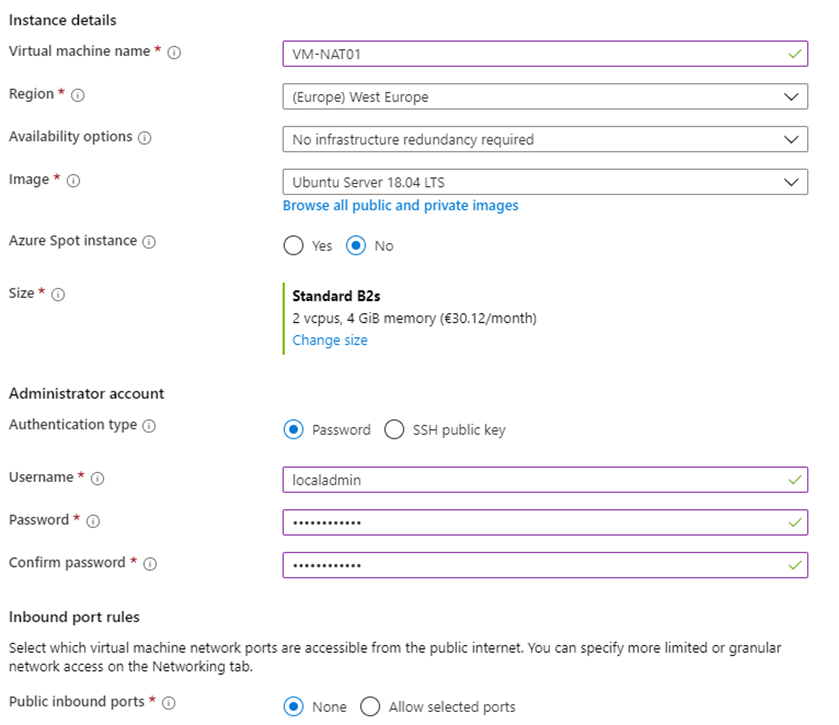
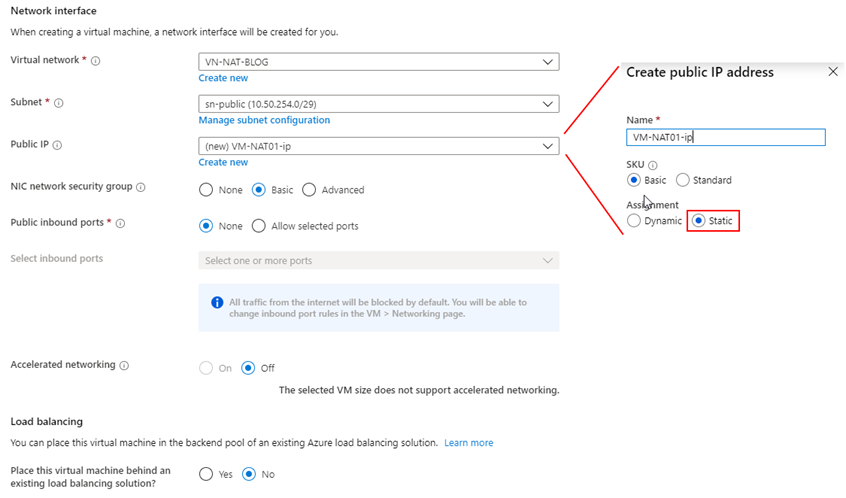
Create a new Ubuntu Server 18.x LTS virtual machine. Any size will do.
IMPORTANT: Put the first network card in the sn-public!!!
| Create new virtual machine
Next |
 |
| I choose Standard HDD for this machine. No data disks are required. SSD is not necessary and only increase the running cost. | 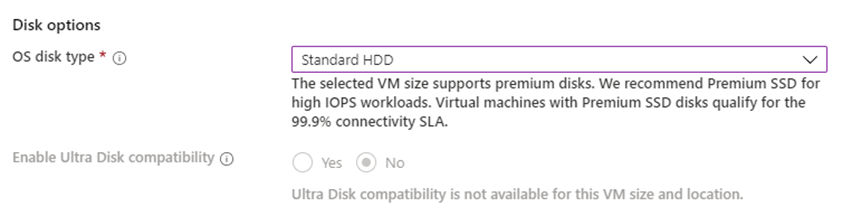 |
| Select the sn-public subnet first. Add a PUBLIC IP and make that ‘static’ this will become the outbound static IP for your WVD clients.
Next Complete the wizard and let Azure deploy the machine. |
 |
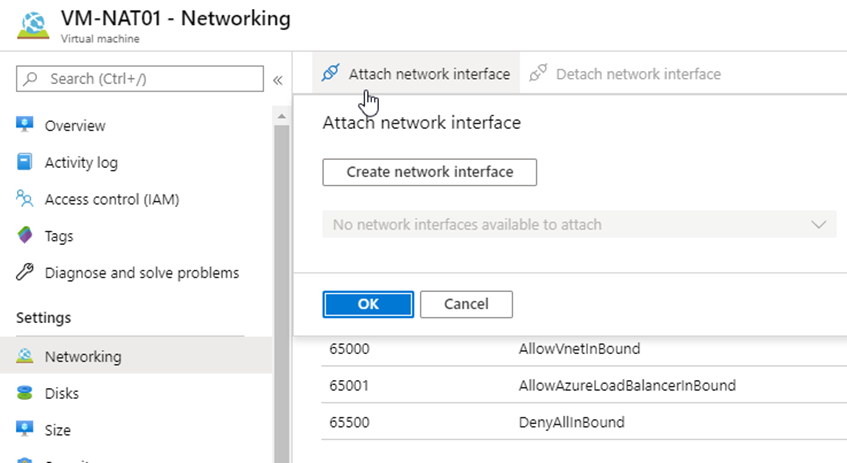
| After deployment go to the networking of the VM.
Click “Attach network interface” Click “Create network interface” |
 |
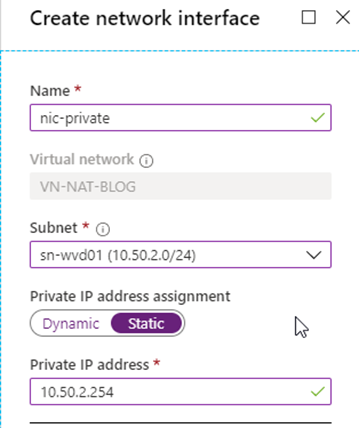
| Name the new network interface, choose the internal subnet where the RDS/WVD clients reside.
Also set a fixed IP in the subnet. 10.50.2.254 |
 |
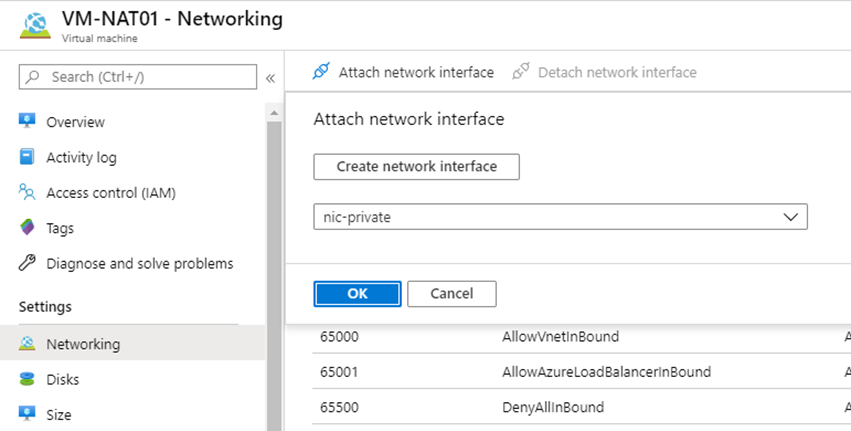
| After the creation of the network interface attach it to the VM.
Note: the VM must be de-allocated so first “STOP” the VM from Azure portal. When the NIC is attached start the VM again. |
 |
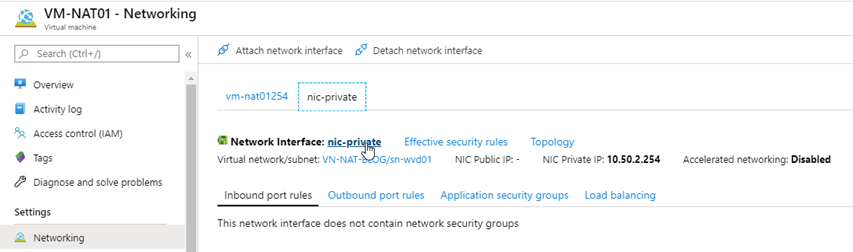
| The new network interface does not automatically attach a Network Security Group (NSG).
Go to the networking settings and select the nic-private. |
 |
| Attach the NSG that was created for the first network interface. | 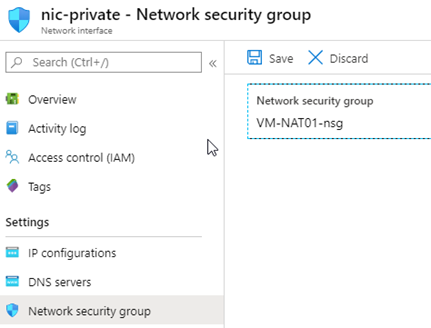 |
Configure the NAT machine.
To configure the NAT-machine we need to login to the VM-WVD01 machine. Because this machine does not have a public IP, nor have I configured Azure Bastion we need to use the VM-BACKEND as a steppingstone.
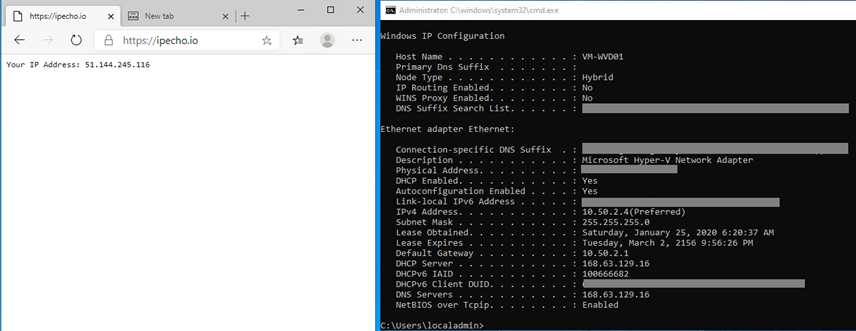
| RDP into the VM-WVD01
Check your current public IP via: |
 |
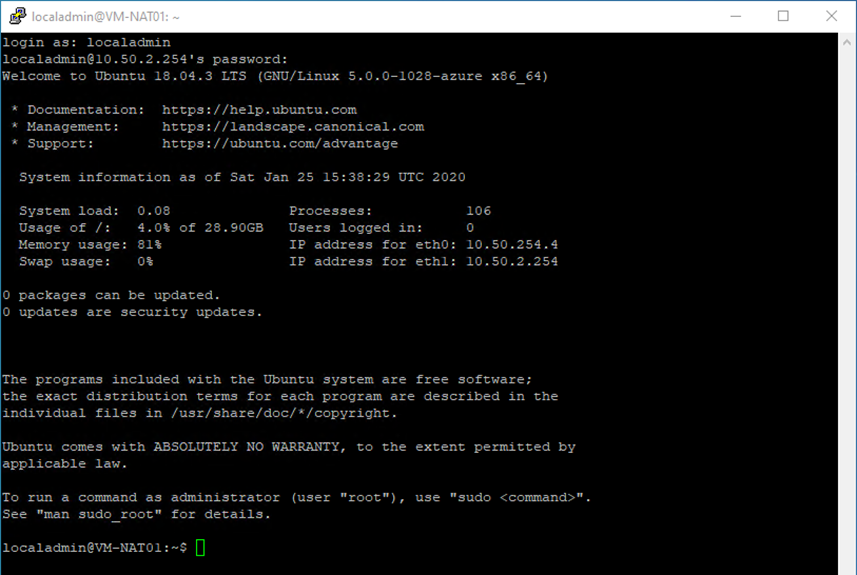
| Next install putty or another SSH application to connect to the Ubuntu server.
Open putty on 10.50.2.254 Login as the root account created during creation. |
 |
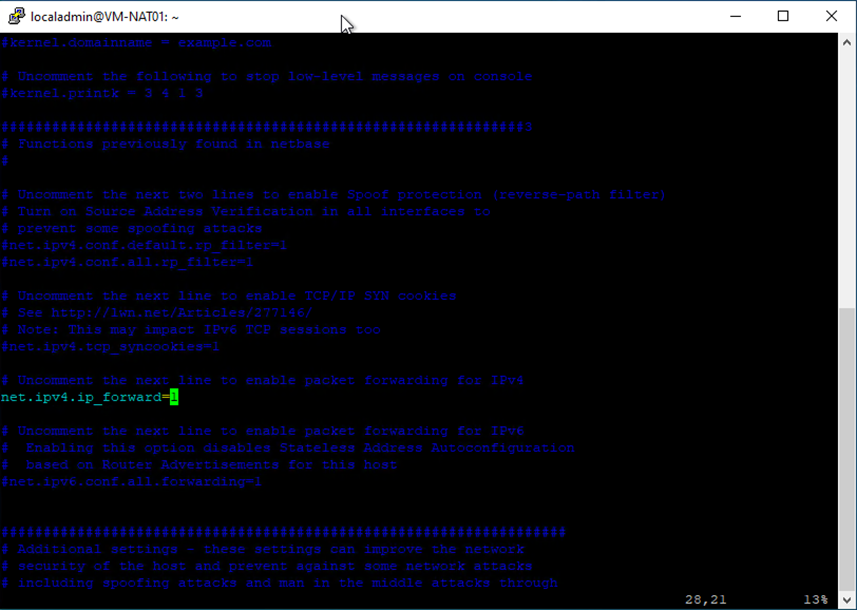
| We need to enable IP forward:
sudo vim /etc/sysctl.conf Uncomment: net.ipv4.ip_forward=1 Save file. Press: <ESC> Type: ‘:wq’ <enter> This will save the file. |
 |
| We need to enable NAT:
sudo iptables -t nat -A POSTROUTING -o eth0 -j MASQUERADE |

sudo iptables -t nat -A POSTROUTING -o eth0 -j MASQUERADE |
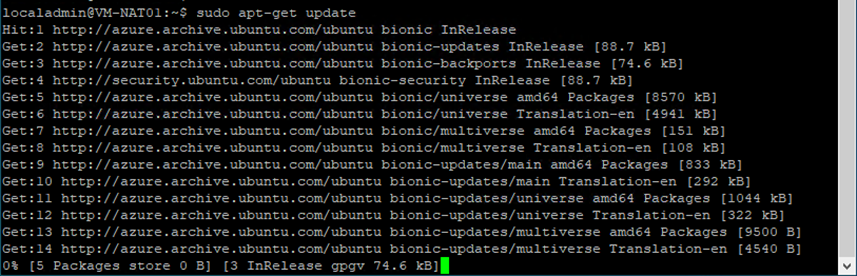
| sudo apt-get update
We need the updates for this to work! |
 |
| sudo apt install iptables-persistent | 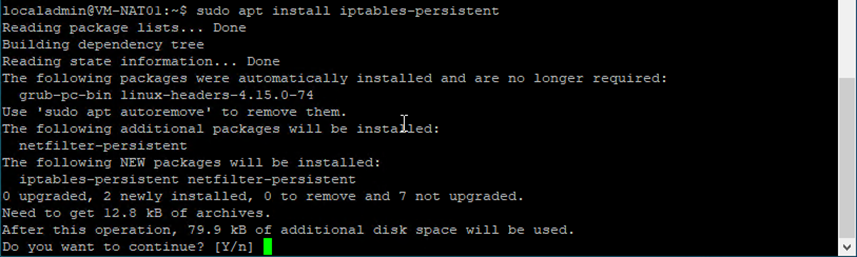 |
| Enter YES twice. | 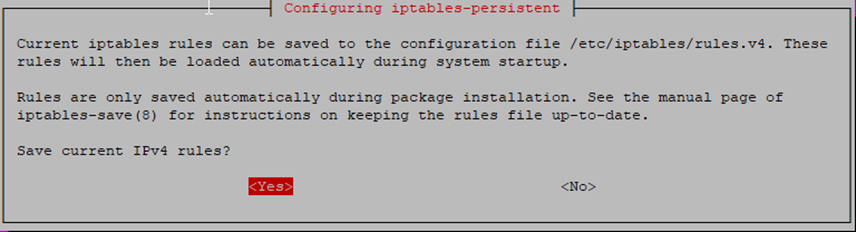 |
| sudo su
sudo iptables-save > /etc/iptables/rules.v4 exit |

sudo su sudo iptables-save > /etc/iptables/rules.v4 exit |
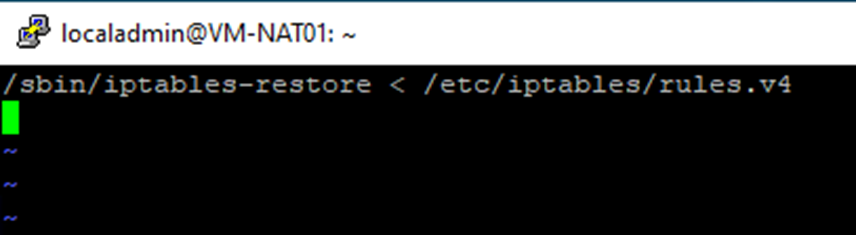
| sudo vim /etc/rc.local
Add this line: PRESS <INS> /sbin/iptables-restore < /etc/iptables/rules.v4 PRESS <ESC> Type: ‘:wq’ <enter> |

|
| sudo reboot | 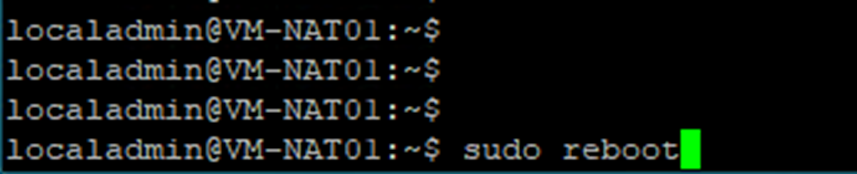 |
| Create a new route table. | 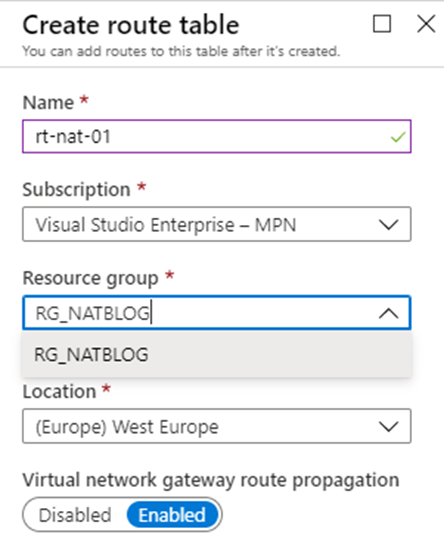 |
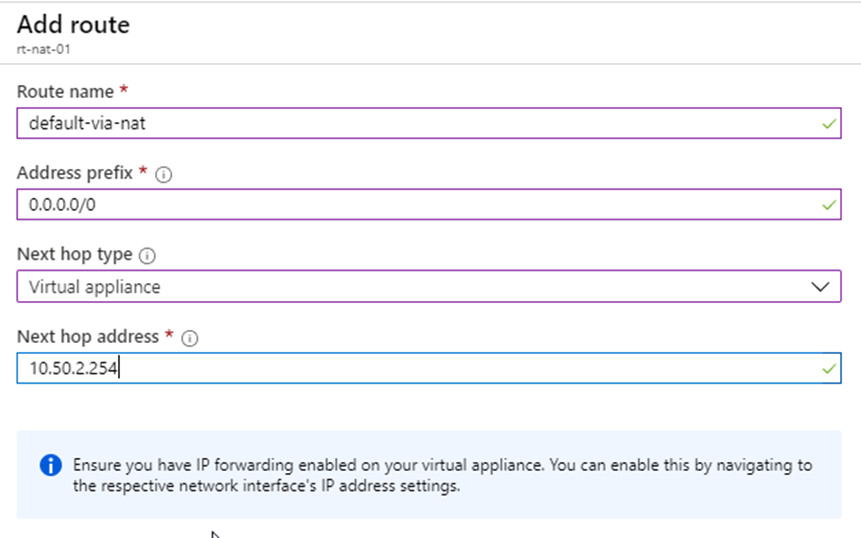
| Add the default route:
0.0.0.0/0 Next hop: virtual appliance 10.50.2.254 |
 |
| Associate the route table to sn-wvd01 | 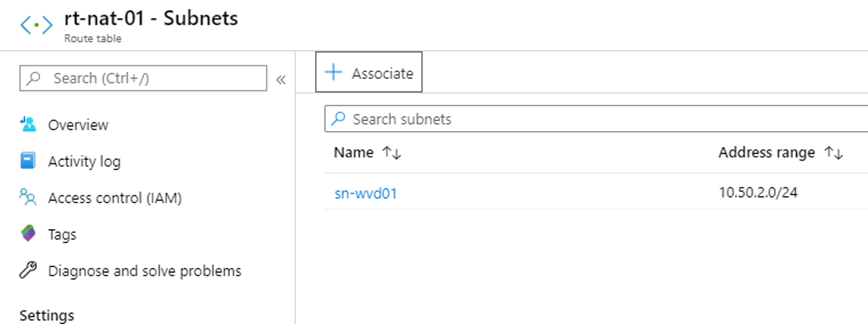 |
Testing the NAT
| RDP back into VM-WVD01 and open a webbrowser.
Goto website: https://ipecho.io and verify the IP address. The 104.40.205.169 is the static number attached to the VM-NAT. |
 |
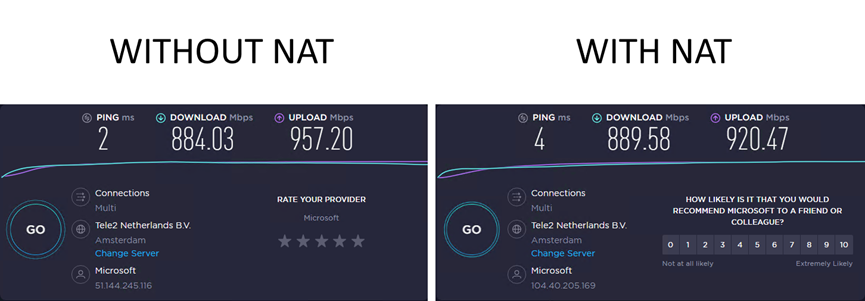
| Performance difference.
No noticeable difference with or without the NAT. |
 |
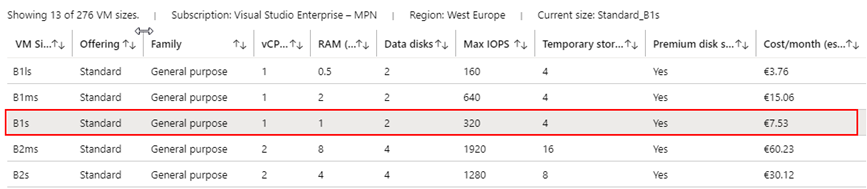
| Costs
This NAT machine can run perfectly on a B1s size costing only € 7.53 per month. |
 |
One thought on “Azure NAT with Ubuntu Linux”