MDT in a Box – Part 3 – Configure MDT
Introduction
This BLOG will describe the instruction how to create your very own “MDT in a Box” server. You can use this server to create images for physical computers, RDS, WVD and probably also other VDI environments. MDT is Microsoft Deployment Toolkit, a few Windows tool to automate the Operation System Deployment (OSD). I use this often in my work for customers to create “golden images” for RDS or WVD.
With the MDT in a box you can create VHD or WIM files for your environments, or for you client environments. You can install several applications, scripts, language packs and updates in this task sequence.
In my work I use MDT to create “golden images” for RDS2019 and Windows Virtual Desktop with Windows 10 Enterprise Multi Session.
This BLOG is very long so I split it in a few parts.
5. Deploy Windows 10 – Multisession (WVD)
MDT in a Box – Part 3 – Configure MDT
From the start menu start “Deployment Workbench” this is the MDT management console.
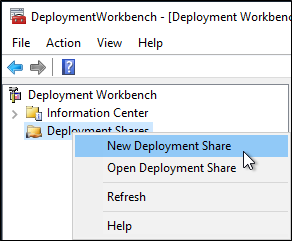
Go to the Deployment Shares, right click on it, and click New Deployment Share.
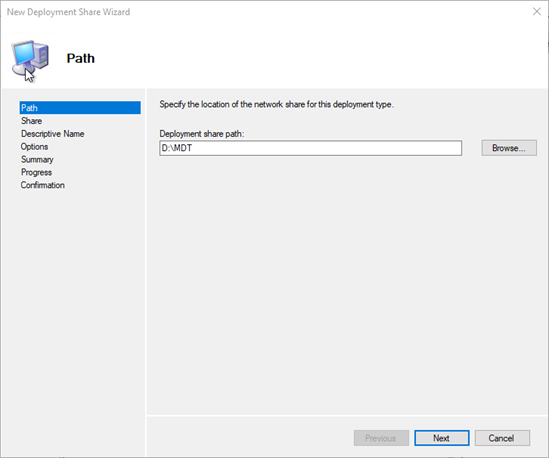
Change the path to something on the D: drive (MDT Drive). I also change the DeploymentShare to MDT, only reason: it is shorter. Next
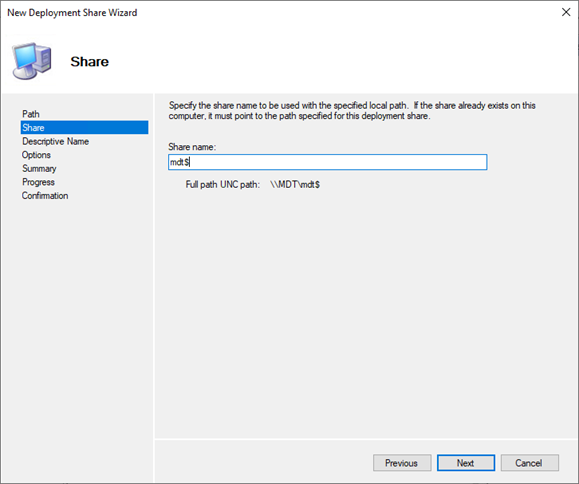
Highly recommended to make this name short also. You might need to enter it manually during troubleshooting etc. so shorter is better.
I name it ‘mdt$’. Next.
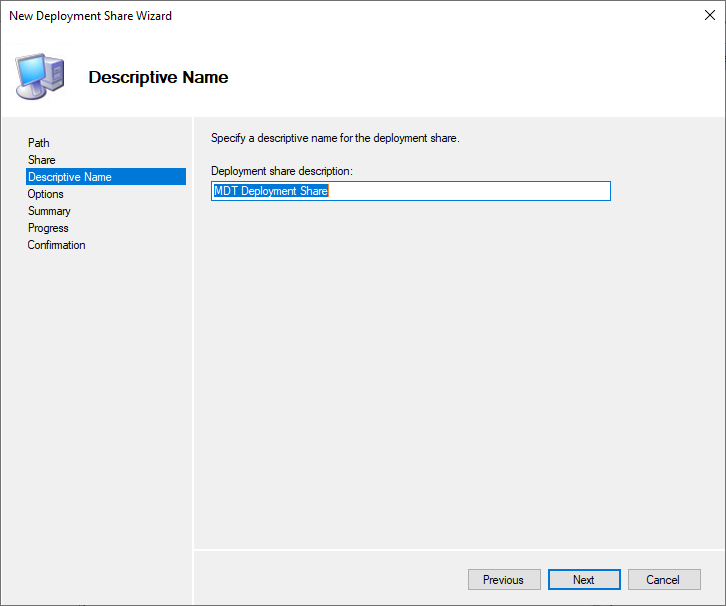
Default description is fine, next.
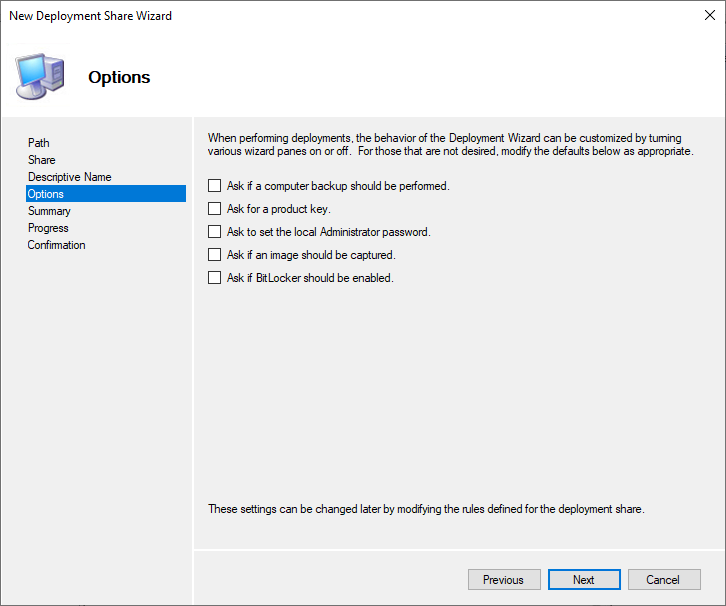
Disable everything, next.

Next, Finish.
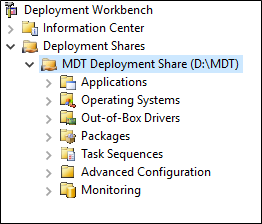
After the process completes you have this in your Deployment Workbench.
Share Permissions
We need to add the service account (sa_mdt) to the Share and to the Security of the MDT folder on the D: drive.
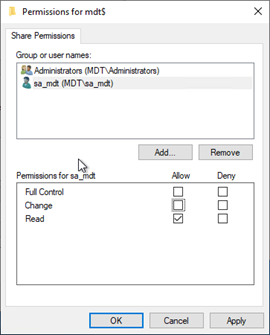
Read permissions for SA_MDT should be enough.
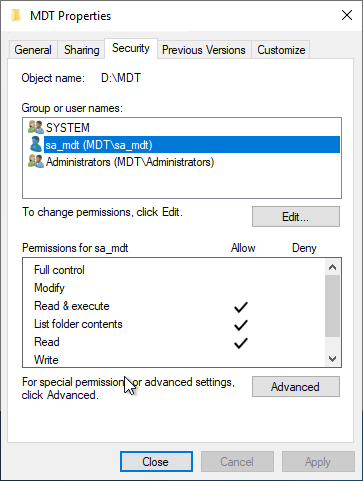
For the NTFS permissions, add the account, and give default read permissions.
Optional create a LOGS folder on the D: drive, share it LOGS$ and give the service account write/change permissions.
Create BOOT media
To allow the Hyper-V VM boot and connect to MDT for the OSD we need to create an ISO file. Follow the next steps.
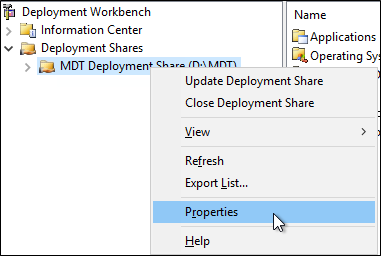
In Deployment Workbench, right click MDT Deployment Share and click properties.
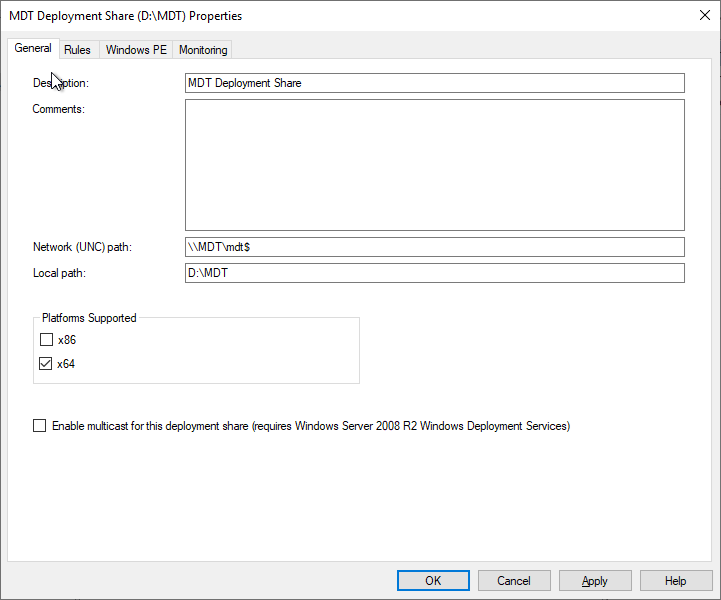
On the first page, disable x86. (I never need it), click apply.
Go to the RULES tab. Copy the text below from [Settings]
[RULES]
[Settings]
Priority=Default
[Default]
UserDataLocation=NONE
OSInstall=Y
AdminPassword=P@ssw0rd
TimeZoneName=W. Europe Standard Time
JoinWorkgroup=WORKGROUP
HideShell=NO
ApplyGPOPack=NO
SkipAdminPassword=YES
SkipProductKey=YES
SkipComputerName=YES
SkipDomainMembership=YES
SkipUserData=YES
SkipLocaleSelection=YES
SkipTaskSequence=NO
SkipTimeZone=YES
SkipApplications=YES
SkipBitLocker=YES
SkipSummary=YES
SkipRoles=YES
SkipCapture=NO
SkipFinalSummary=YES
SLShare=\\192.168.173.1\logs$
SLShareDynamicLogging=\\192.168.173.1\logs$
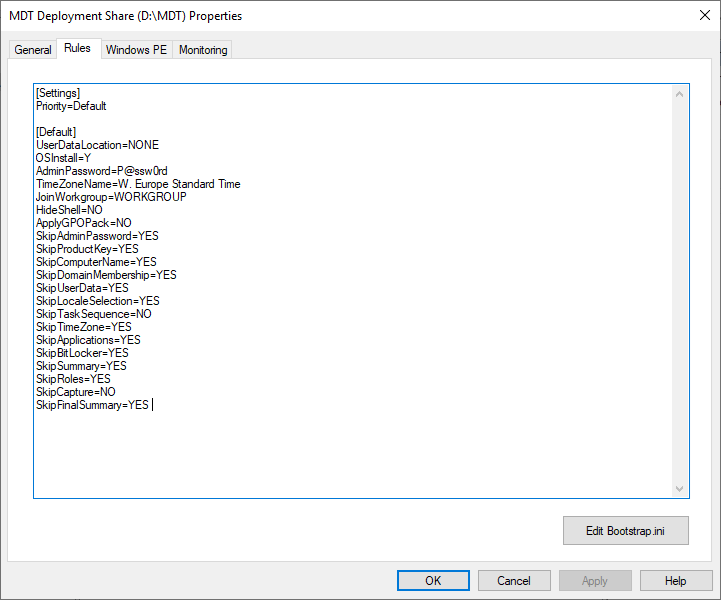
Paste the text in this box. The AdminPassword is the default password of the admin account after the OSD. The TimeZone is where I live, you can customize this according to your location.
AdminPassword=P@ssw0rd
TimeZoneName=W. Europe Standard Time
For all other settings just copy/paste my settings and when you have everything working you can experiment with them.
Click Apply, then click Edit Bootstrap.ini.
Copy the text below.
[Settings]

Priority=Default

[Default]
DeployRoot=\\192.168.173.1\mdt$
SkipBDDWelcome=YES
KeyboardLocale=en-US
UserID=sa_mdt
UserPassword=P@ssw0rd
UserDomain=.
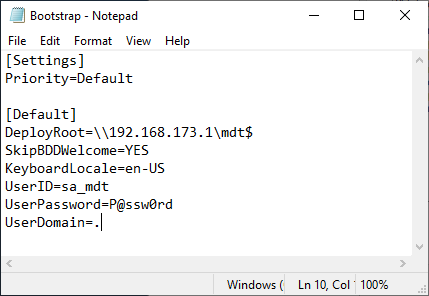
Default the DeployRoot contains a name in the UNC path. So be sure it works I always change it to the IP number. If you are sure DNS will resolve correctly you can use the name, else use the IP number. I also use the NAT IP number; it will not change so I can use this.
Also enter the service account name and password, and if applicable the UserDomain.
Save the bootstrap Notepad and close it. Click Apply, and go to the Windows PE TAB.
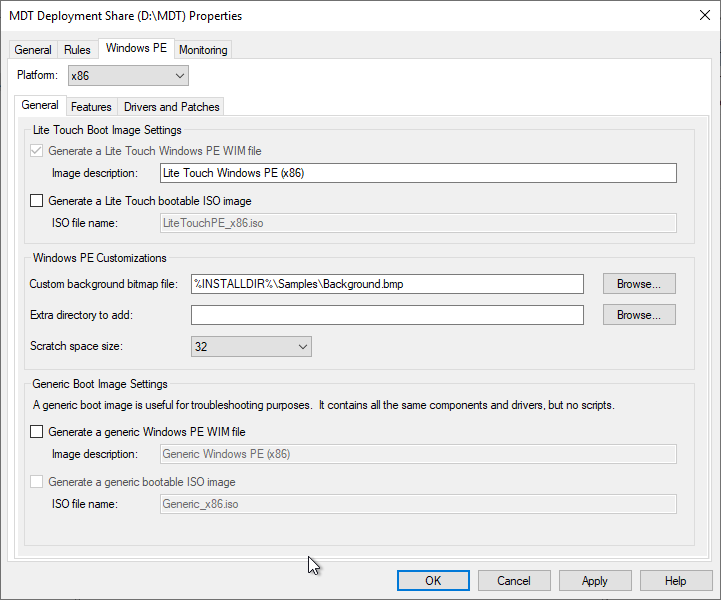
On top you see the Platform x86 selected. Disable “Generate a Lite Touch bootable ISO image” and click Apply.
Change the Platform to x64.
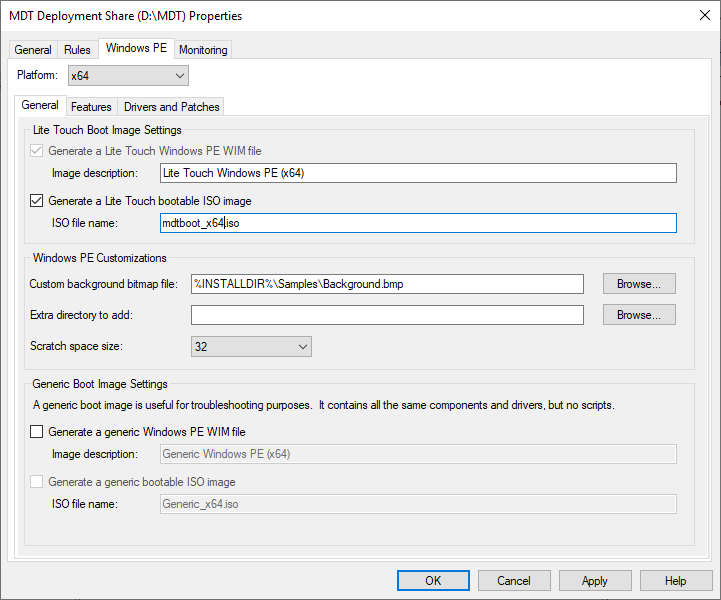
Make sure “Generate a Lite Touch bootable ISO image” is enabled, you can change the filename of the BOOT ISO if you like. Press Apply and OK.
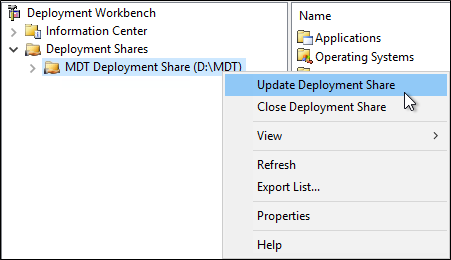
In Deployment Workbench, right click MDT Deployment Share and click Update Deployment Share.
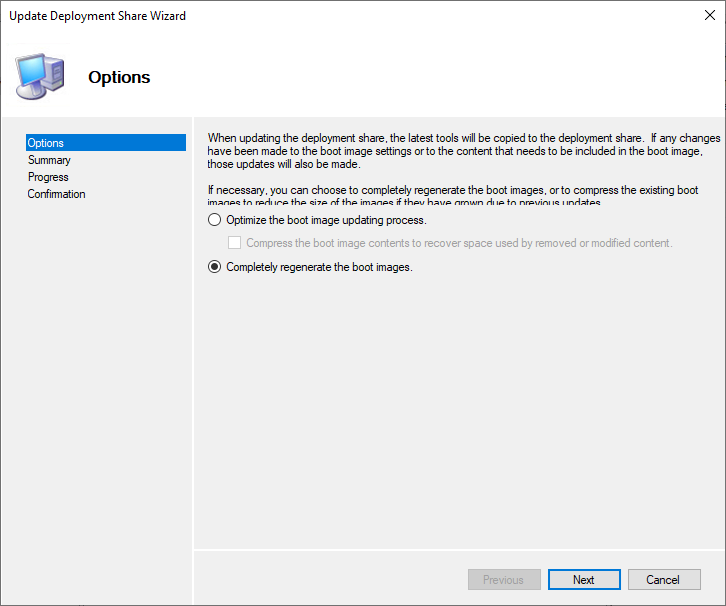
Select “Completely regenerate the boot images” and press next, next, finish. This will start a process that will generate boot images and built the ISO file. Just drink some coffee and come back later.
Note: Every time you change something in these settings you need to upgrade the boot image. Some changes only need the Optimize the boot image updating process. What always works is Completely regenerate the boot images, but that takes longer.
End of part 3, continue on part 4.